Winter has a way of making us crave all things cozy, and that includes cute winter nails! As the temperature drops and the holidays approach, there’s something special about embracing the charm of the season through our nail art. Whether it’s the soft hues of winter or delightful designs inspired by furry friends, these nail ideas can brighten your days and bring a touch of warmth to chilly nights.
If you love to express your personality through your nails, this post is for you! We’ve gathered a collection of 15 adorable winter nail ideas that are not only festive but also perfect for animal lovers. From cute penguins to cozy knit patterns, there’s something here for everyone. You’ll discover designs that capture the essence of winter while keeping your nails looking stylish and fun.
Get ready to explore unique nail art that reflects the soft color palettes and cozy vibes of winter. You’ll find tips for recreating each design and inspiration to help you celebrate the season. Whether you’re getting ready for a holiday party or just want a touch of winter magic in your everyday life, these cute winter nails ideas will warm your heart and enhance your style.
Key Takeaways
– Discover a variety of cute winter nails that blend festive charm with soft, cozy aesthetics.
– Explore winter nail designs, including adorable animal themes and textured patterns that evoke warmth.
– Learn about cozy nail art techniques, such as knit patterns and ombre effects, to elevate your winter style.
– Get inspired by cute nail ideas featuring delightful characters like penguins and snowmen, perfect for animal lovers.
– Find practical tips to recreate these festive nail trends at home, making your winter manicure fun and easy.
1. Frosty Blue Ombre
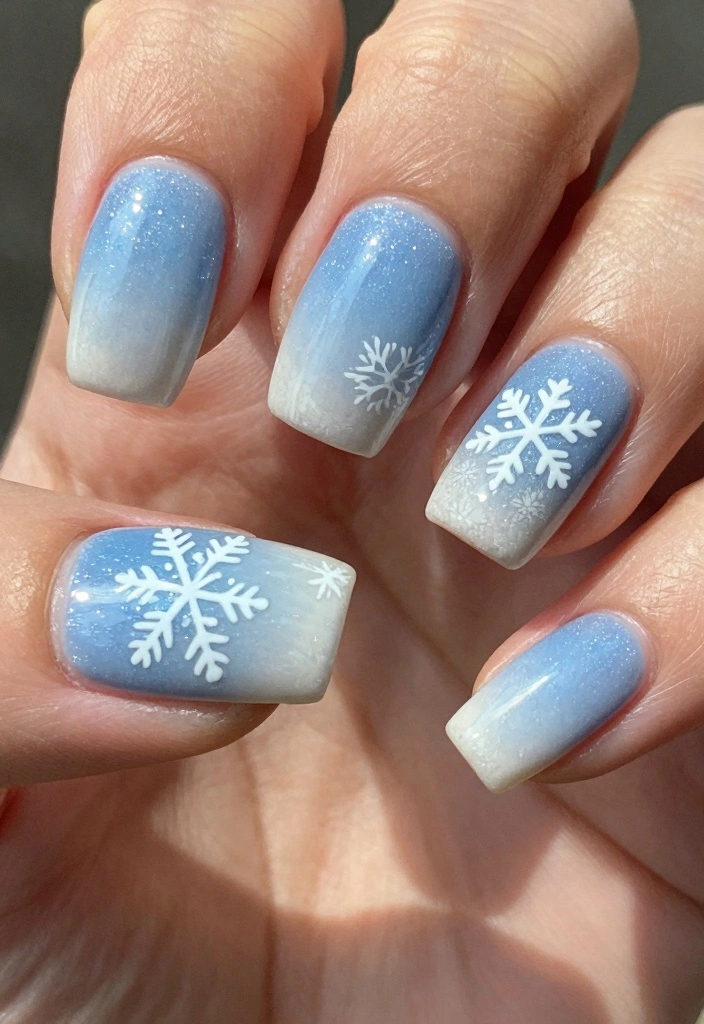
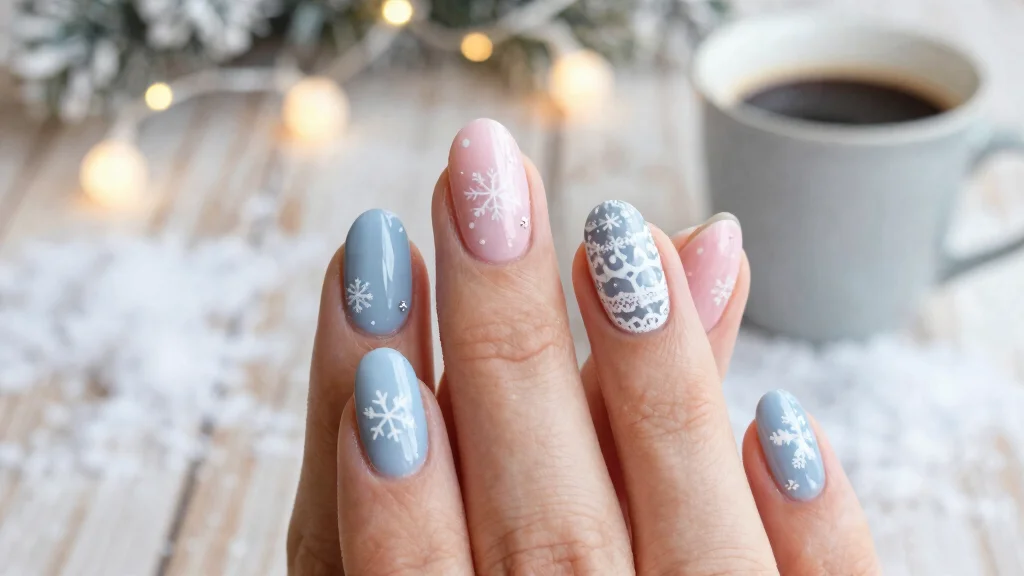
Transform your nails into a winter wonder with a frosty blue ombre design. This stunning look combines gentle shades of blue fading into crisp white, capturing the essence of a serene winter sky. The ombre technique adds a touch of elegance while remaining straightforward to achieve, making it perfect for any occasion.
To recreate this design, start with a smooth base coat to ensure a flawless finish. Choose two complementary shades of blue along with a bright white polish. Apply the lighter blue at the base and blend it towards the tip using a makeup sponge for that seamless gradient. Seal your masterpiece with a glossy top coat for extra shine.
Key steps to get started:
– Apply a base coat for a smooth finish
– Blend two shades of blue with white
– Use a makeup sponge for the ombre effect
– Finish with a shiny top coat
This chic look showcases your love for winter while keeping your nails effortlessly stylish.
How To Choose Cute Winter Nails
Choosing the perfect cute winter nails can be a delightful yet overwhelming task. With so many options, it’s essential to narrow down your choices to find the designs that truly resonate with your style and the cozy winter vibes. Here’s how to make the best selection:
1. Consider the Occasion
Think about where you’ll be showcasing your nails. Are you preparing for a festive holiday party, or are you looking for something casual? For festive events, playful designs like cute snowmen or candy cane stripes might suit perfectly. For everyday wear, you might prefer soft color palettes like frosty blue ombre or cozy knit patterns.
2. Choose Your Color Palette
Winter is all about soft, cozy colors. Consider shades like icy blues, soft grays, gentle whites, and warm neutrals. These colors not only evoke winter vibes but also go well with many outfits. If you want some sparkle, choose designs that incorporate glitter, like icy glitter tips or soft rose gold accents.
3. Think About Your Nail Length and Shape
Your choice of nail length and shape can greatly affect the design. Long nails can showcase intricate designs, like a snowy mountain landscape or cute animal faces, while shorter nails may look best with simpler patterns, such as twinkling lights or polar bear art. Make sure the design complements your nail shape for a polished look.
4. Experiment with Textures
Textures can add depth to your winter nail designs. Consider incorporating matte finishes paired with glossy accents, or even textured designs that mimic cozy knit patterns. You could also explore designs that feature elements like frost on leaves or the smooth finish of a cozy hot cocoa-inspired look. Combining different textures can make your nails stand out.
5. Determine Your Skill Level
Are you a DIY nail art enthusiast or would you prefer to visit a nail salon? If you’re opting for at-home designs, choose simpler styles that match your skill level. For example, cute penguin patterns or natural frosted leaves can be easier to manage. If you’re confident in your nail art skills, go for more complex designs like a winter wonderland watercolor or a snowy forest scene.
6. Stay Updated with Trends
Winter nail trends often shift each year. Stay in the loop by checking social media platforms like Instagram or Pinterest for inspiration. You may find that certain styles are trending, such as playful animal designs or soft pastels that bring a fresh twist to traditional winter themes. Don’t hesitate to mix classic styles with current trends to create something uniquely yours.
Pro Tip: Before committing to a design, try out a few ideas using nail stickers or press-on nails. This allows you to experiment with different styles and colors without a long-term commitment. Once you find your favorite, you can create a similar look with polish or visit a salon for professional application. Enjoy the process and let your creativity shine!
2. Cozy Knit Patterns
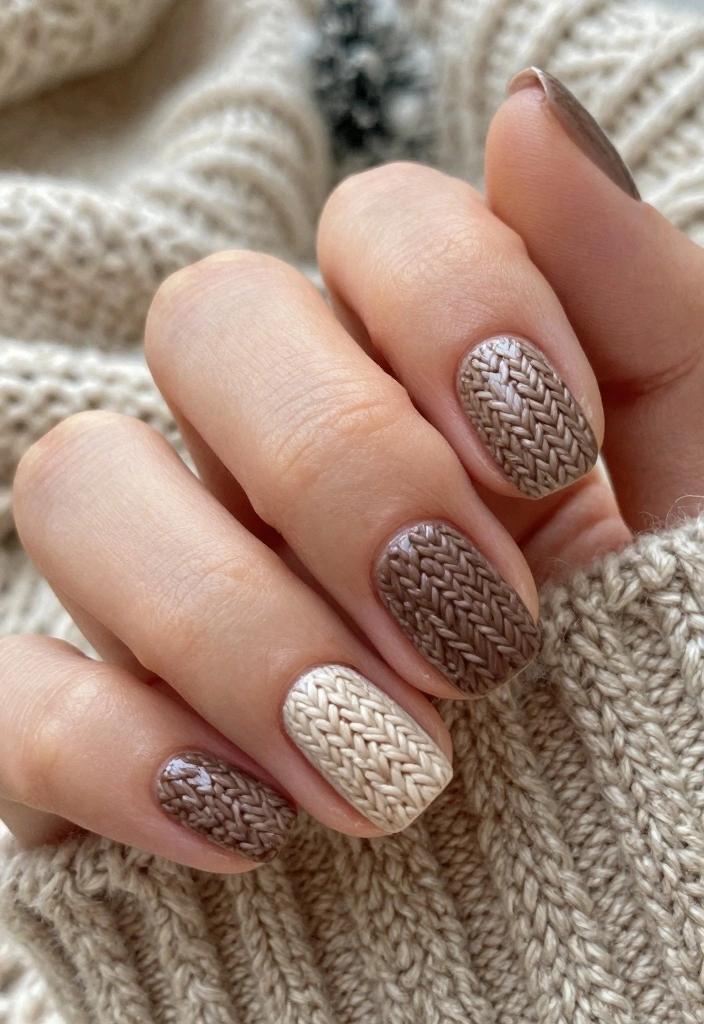
Bring the warmth of your favorite knit sweater to your nails with cozy knit patterns! This delightful design can be crafted using nail art brushes or stamping plates, offering a chic yet comforting look perfect for the season. With soft color palettes, you can achieve a stylish and inviting vibe.
To create this cozy design, start with a warm beige or cream base to set the tone. Use a thin brush or stamping plate to add a knit pattern in a contrasting color. For an authentic touch, apply a matte top coat to mimic the texture of a sweater.
Key tips for your cozy nails:
– Choose a warm beige or cream base
– Use a darker color for the knit pattern
– Add a matte top coat for texture
– Consider cute motifs like paw prints
This design not only looks cute but also wraps your fingers in warmth, perfect for your winter style!
3. Adorable Animal Faces
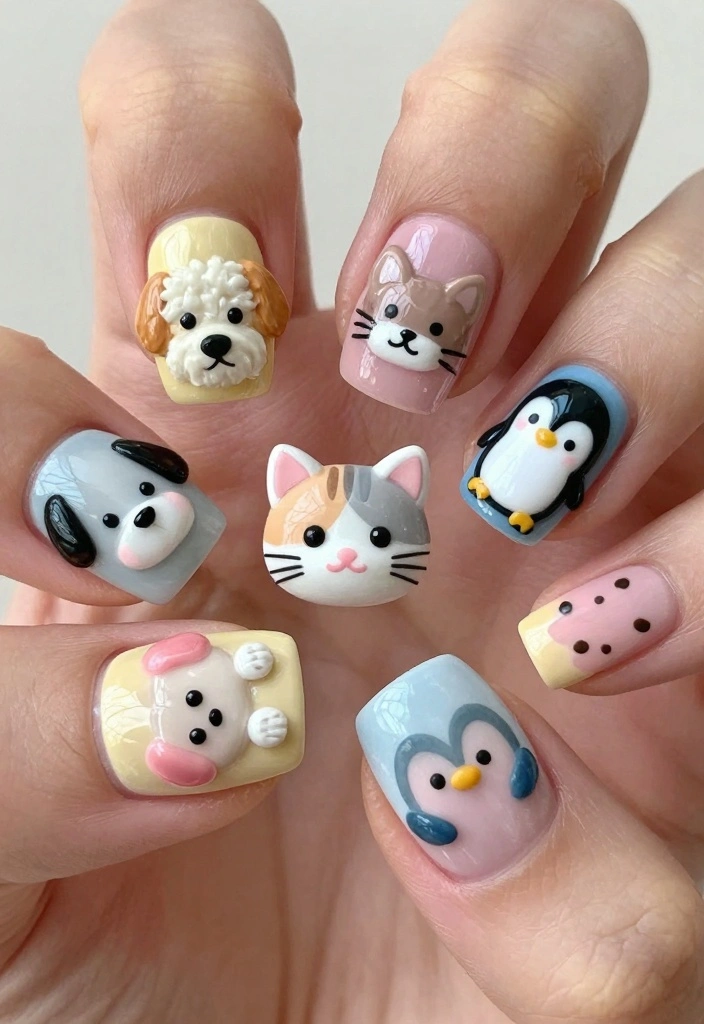
Show off your love for animals with adorable animal faces on your nails! From playful puppies to charming penguins, these designs are sure to bring a smile to your face. Each nail can feature a different animal, adding a fun and whimsical touch to your winter look.
To achieve this playful style, start with a pastel base color that suits your taste. Use a fine brush or dotting tool to create the animal faces, beginning with larger shapes in white for the heads and detailing them with colors like black, brown, or pink. Finish with a glossy top coat to enhance the charm.
Here’s how to create your animal-themed nails:
– Paint a pastel base color of your choice
– Use a fine brush for animal faces
– Add details with contrasting colors
– Seal with a shiny top coat
These delightful designs not only keep your nails looking cute but also express your passion for animals in a fun way!
4. Icy Glitter Tips
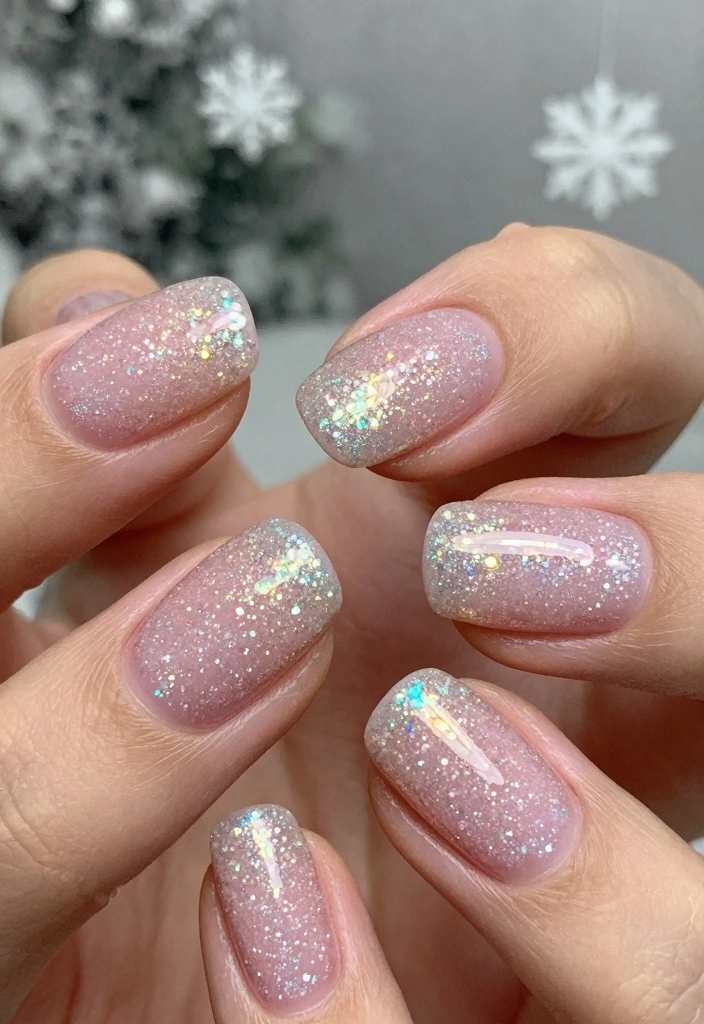
Elevate your winter nail game with icy glitter tips that shimmer like freshly fallen snow! This glamorous design is not only stylish but also easy to create, making it perfect for those busy days.
To start, choose a soft base color like pale pink or mint green to create a fresh look. Once your base is dry, apply glitter to the tips of your nails using silver or iridescent glitter for that frosty finish. Seal your design with a high-shine topcoat to ensure it lasts and sparkles.
Key steps for your glittery tips:
– Select a soft base color
– Apply glitter at the tips for a frosty effect
– Use silver or iridescent glitter for sparkle
– Finish with a high-shine topcoat
This design is perfect for festive occasions, adding a magical touch to your winter celebrations!
5. Snowy Mountain Landscape
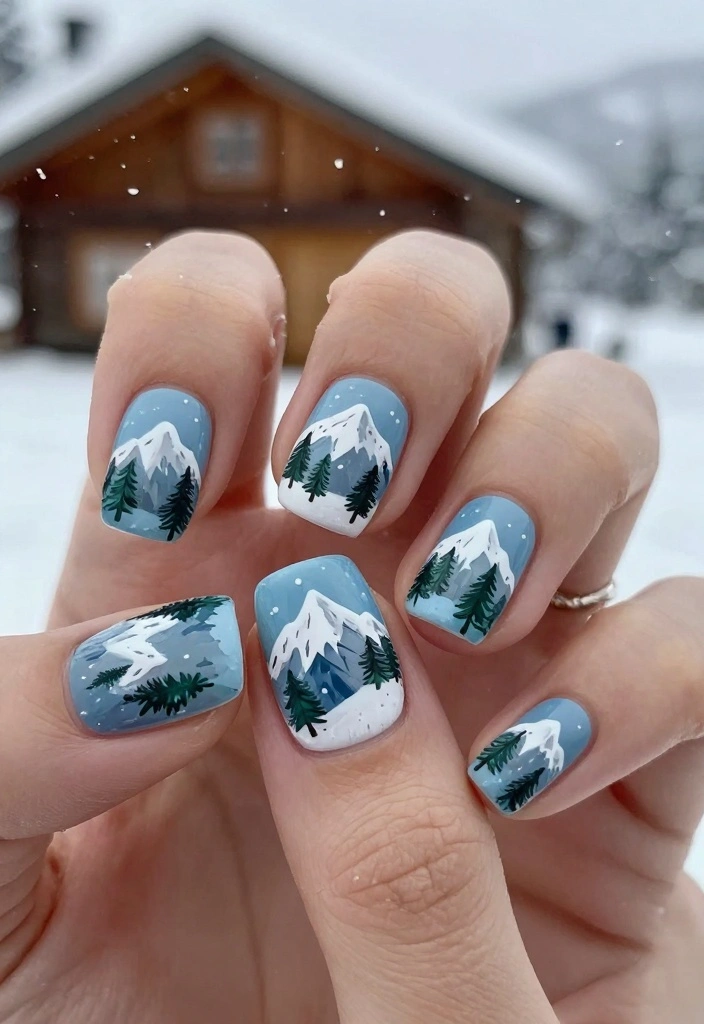
Capture the breathtaking beauty of snowy mountain landscapes on your nails! This artistic design reflects the tranquility of winter scenes and is sure to impress anyone who sees it.
Begin by painting your nails a deep sky blue or soft grey for the backdrop. Use white polish to create the mountain peaks, layering for depth and realism. Finish the scene with tiny trees in dark green or silhouettes of winter animals to bring your design to life.
Steps to create your mountain scene:
– Paint a deep blue or soft grey base
– Add white peaks for depth
– Include dark green trees or silhouettes
– Customize with your favorite winter elements
This design serves as a beautiful reminder of nature’s splendor during the cold months, perfect for any nature lover!
6. Polar Bear Nail Art

Who can resist the charm of a cute polar bear on your nails? This whimsical design adds a playful touch to your winter look, featuring an adorable bear on accent nails while keeping others simple.
To create this delightful design, start with a white base for the polar bear. Use black for the eyes and nose, and soft pink for the cheeks. You can even add a tiny scarf for extra cuteness! Paint the remaining nails in a pastel blue or icy grey for a lovely contrast, finishing with a sprinkle of silver glitter for a touch of sparkle.
Key steps for your polar bear nails:
– Start with a white base for the bear
– Use black and pink for details
– Paint other nails in pastel colors
– Add silver glitter for shine
This design is not only adorable but also a charming reminder of the beauty of winter wildlife!
Winter feels softer when your nails wear a tiny polar bear charm. Cute winter nails turn chilly days into cozy moments you can flaunt. Keep the rest simple, and let that adorable bear steal the show.
7. Winter Wonderland Watercolor

Create a dreamy winter look with watercolor techniques that blend beautifully on your nails. This design allows soft colors to flow together, mimicking winter skies and frosty landscapes.
To achieve this enchanting style, start with a white or light blue base. Mix colors like light purple, blue, and white, applying them in soft strokes for that ethereal effect. Blend the hues using a small brush or sponge, and finish with a glossy top coat to protect your artwork and add shine.
Steps to create your watercolor nails:
– Use a white or light blue base
– Blend soft colors for a dreamy look
– Use a small brush or sponge for blending
– Finish with a glossy topcoat
This versatile design lets you play with colors and incorporates tiny snowflakes for an extra magical touch!
8. Cute Penguin Patterns
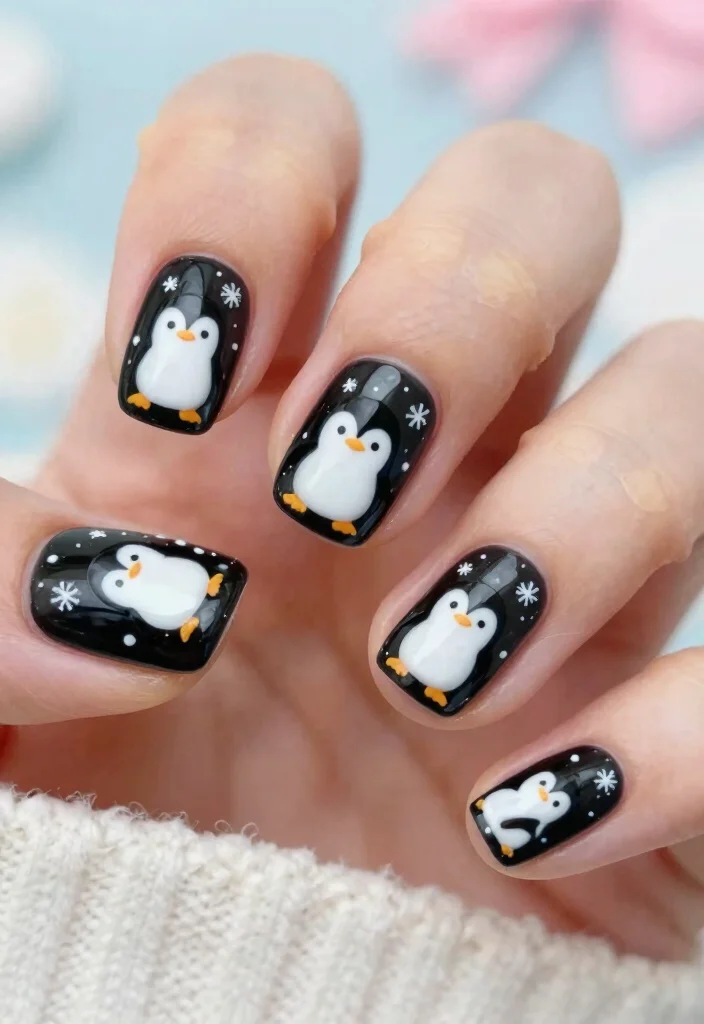
Celebrate the winter season with an adorable penguin-themed nail design! These charming creatures embody cuteness, making them a perfect choice for your winter nail art.
To create your penguin nails, start with a black base for the penguin body on your accent nails. Paint the belly white and use orange for the beak and feet. For the remaining nails, opt for a soft blue or pale pink background. Add tiny snowflakes or hearts around the penguins for a whimsical flair.
Key steps for your penguin pattern:
– Use a black base for penguin bodies
– Paint white bellies with orange details
– Choose a soft color for other nails
– Add snowflakes or hearts for charm
This playful design will definitely bring smiles wherever you go!
9. Snowy Forest Scene
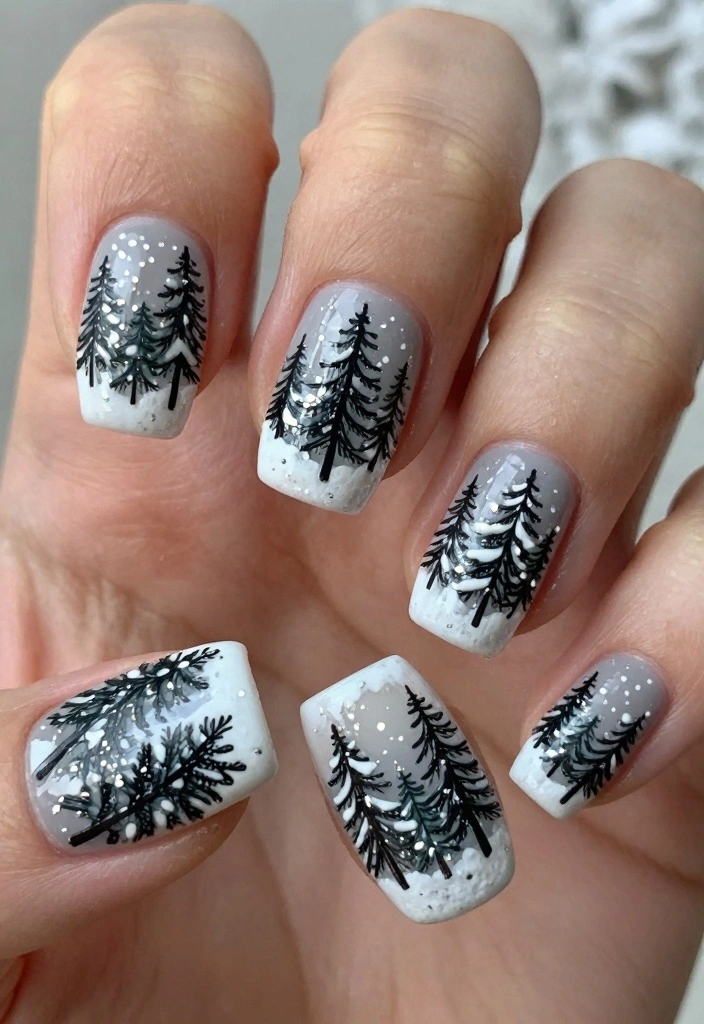
Bring the serene beauty of a snowy forest to your nails with a design featuring majestic trees dusted with snow. This elegant look is perfect for winter festivities.
To recreate this scene, start with a light grey or soft lavender base. Use a fine brush to paint tall evergreen trees in dark green, adding white to represent snow on the branches. Finish with a sprinkle of silver glitter to mimic falling snowflakes, enhancing the magical feel.
Steps to create your snowy forest scene:
– Choose a light grey or soft lavender base
– Paint dark green trees with white snow
– Sprinkle silver glitter for effect
– Capture the serene essence of winter
This design evokes tranquility and serves as a beautiful reminder of nature during the colder months.
10. Festive Candy Cane Stripes
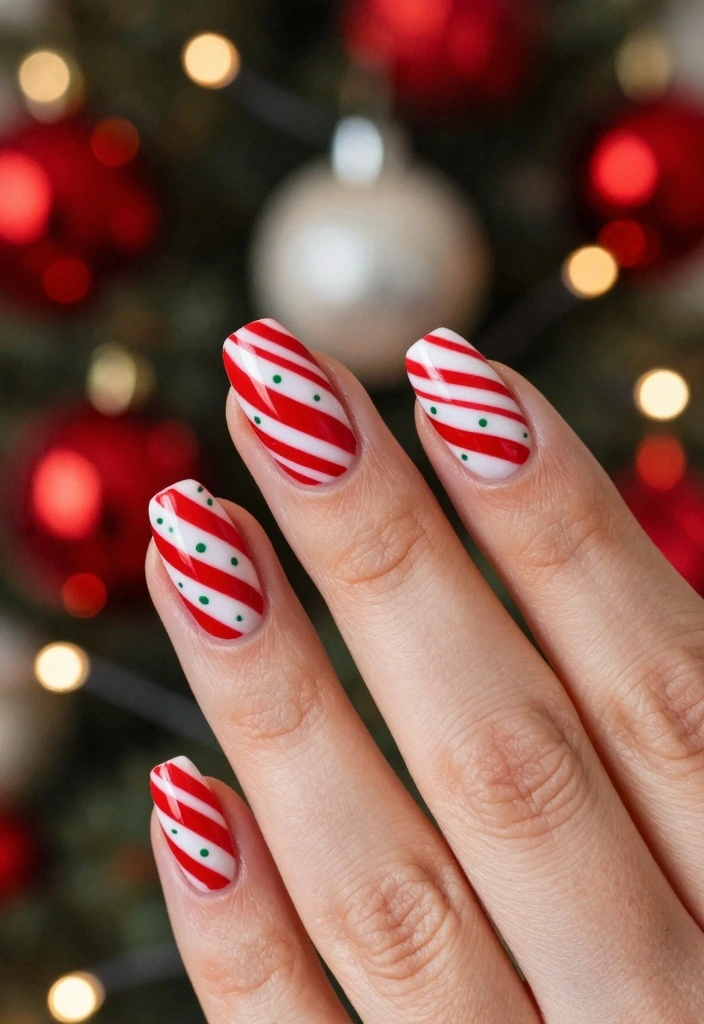
Embrace the festive spirit with cheerful candy cane stripes on your nails! This design is not only fun but also perfect for holiday parties and gatherings.
To achieve this sweet look, start with a bright red base coat to capture attention. Use white polish to create diagonal stripes across your nails, and for an extra festive twist, add tiny green dots or hearts in between the stripes for a playful touch.
Key steps to create your candy cane stripes:
– Use a bright red base coat
– Paint diagonal white stripes on top
– Add green dots or hearts for fun
– Perfect for holiday cheer
This design embodies the cheerful vibes of the season while keeping your look lighthearted and playful!
11. Soft Rose Gold Glitter
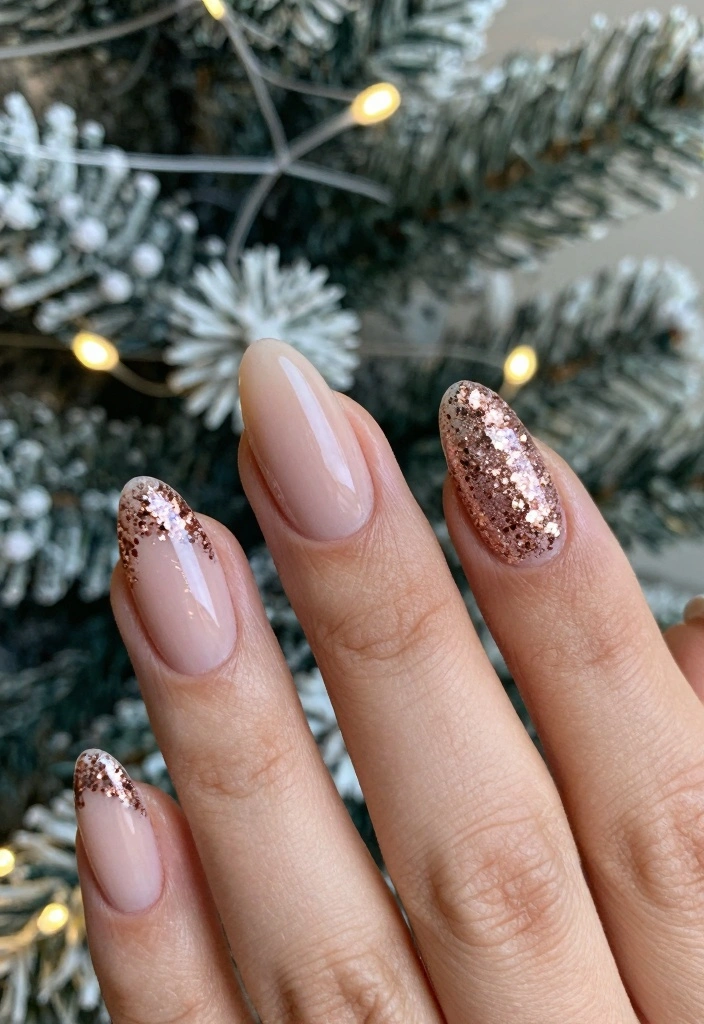
Add a touch of elegance to your winter nails with the soft glow of rose gold glitter. This design combines gentle colors and sparkling glitter for a sophisticated yet cozy vibe.
To create this elegant look, start with a nude or soft pink base coat. Apply a layer of rose gold glitter at the tips or as an accent on one or two nails. Finish with a shiny top coat to seal in the sparkle and add depth.
Steps to achieve your rose gold nails:
– Begin with a nude or soft pink base
– Apply rose gold glitter at the tips
– Use a shiny top coat for added shine
– Experiment with geometric shapes for a modern twist
This design is perfect for any winter event, adding just the right amount of glam to your style!
❝ Fun fact: rose gold glitter instantly elevates cute winter nails without overpowering them. Pro tip: start with a nude base, dab rose gold glitter at the tips, then seal with a top coat for lasting sparkle and cozy charm. ❞
12. Cute Snowman Designs
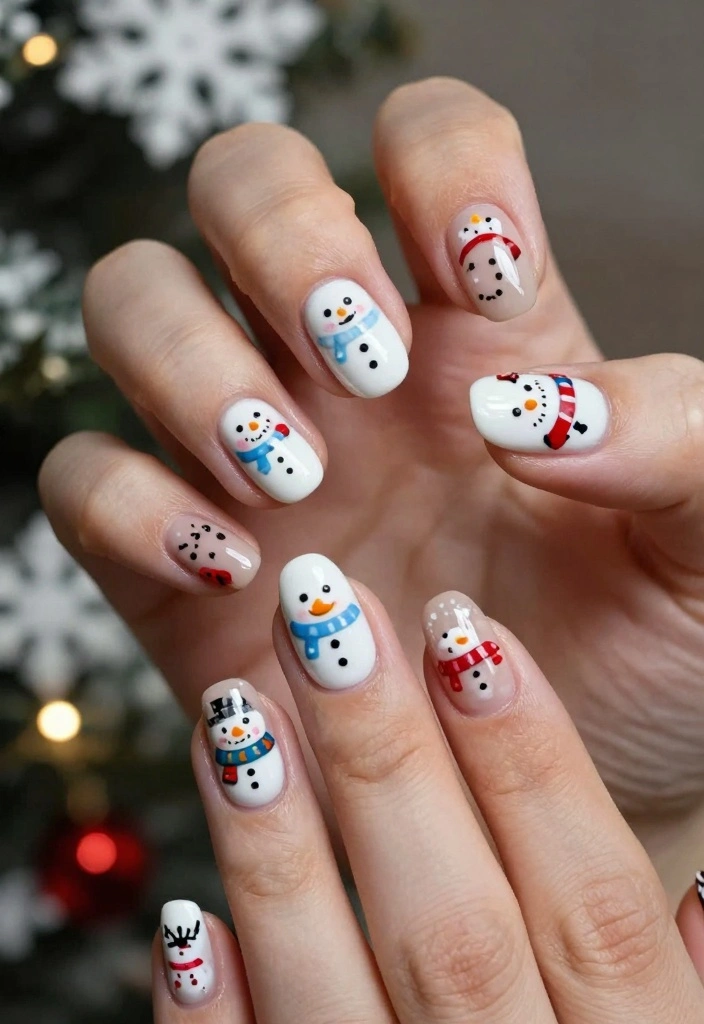
Spread cheer this winter with adorable snowman nail designs! These friendly snowmen can be painted on accent nails, bringing joy to your fingertips.
To bring these characters to life, start with a white base for the snowman. Use black for the eyes and buttons, and add a bright orange carrot nose. Complete the look with a colorful scarf in shades like red or green. Paint the remaining nails in complementary blue or soft lavender for a harmonious finish.
Steps to create your snowman nails:
– Start with a white base for the snowman
– Add black details and an orange nose
– Paint remaining nails in a complementary color
– Celebrate the joy of winter with this design
This design adds a cute touch to your winter look while embodying the season’s joy!


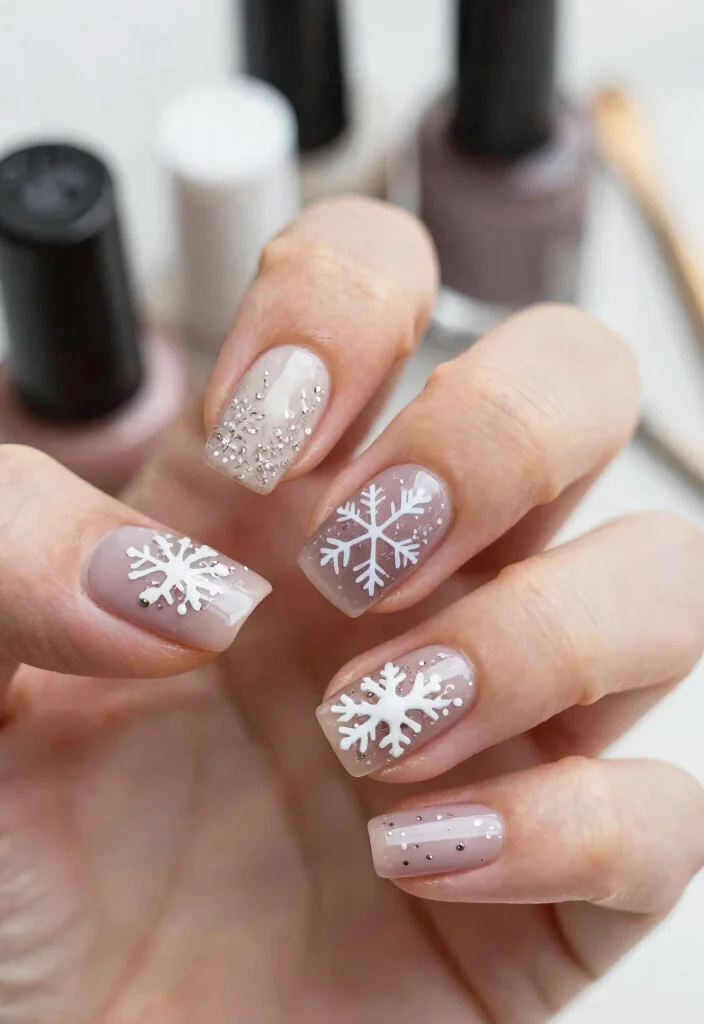
13. Natural Frosted Leaves
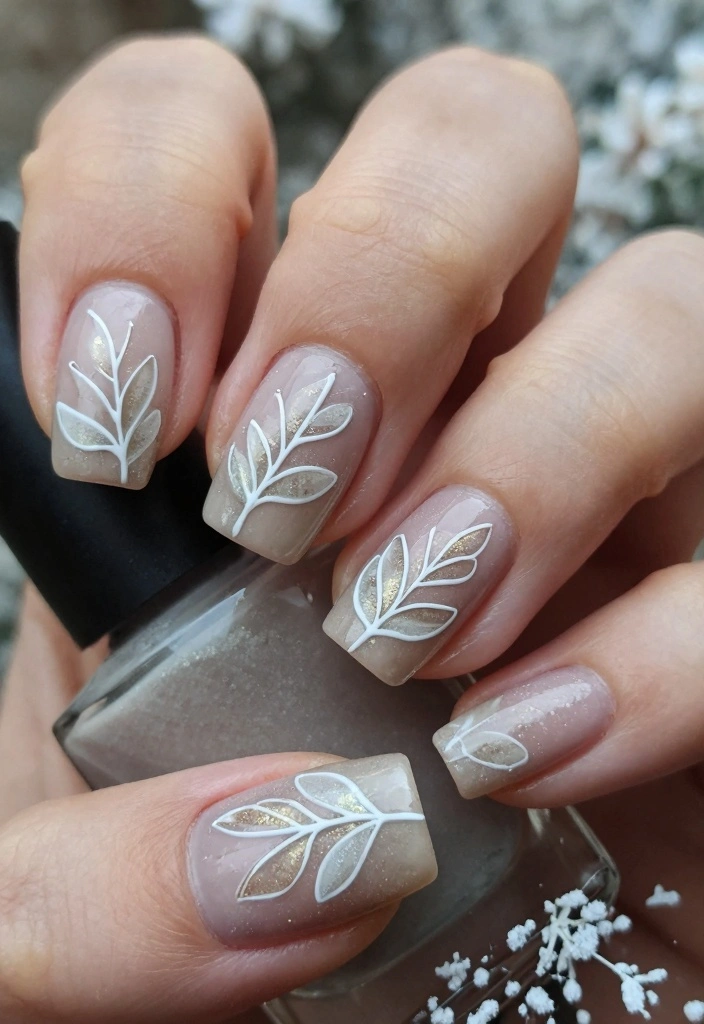
Inspired by the beauty of nature, this design features frosted leaves that capture the essence of winter foliage. Perfect for those who appreciate a more understated look!
To create this elegant design, start with a soft beige, grey, or muted green base. Use a fine brush to paint leaf outlines in white, adding a touch of glitter for that frosty effect. Consider accenting the design with tiny gems or pearls to enhance its natural beauty.
Key steps for your frosted leaves:
– Use a soft beige or muted green base
– Paint white leaf outlines with glitter
– Add tiny gems or pearls for sparkle
– Embrace the elegance of winter
This design is perfect for minimalists who love to showcase winter’s beauty without overwhelming details!
14. Twinkling Lights Design

Bring the festive spirit of the holidays to your nails with a twinkling lights design! This playful look captures the essence of joyful celebrations.
To achieve this fun design, start with a dark base color like deep blue or black for a striking contrast. Use a fine brush to paint colorful dots resembling Christmas lights and connect them with small lines to mimic string lights. Finish with a shiny top coat for a dazzling effect.
Steps to create your twinkling lights:
– Choose a dark base color for contrast
– Paint colorful dots for lights
– Connect dots with lines for string effect
– Finish with a glossy topcoat
This design is not only playful but also allows for creativity with color combinations, perfect for showcasing your festive spirit!
15. Cozy Hot Cocoa Inspired
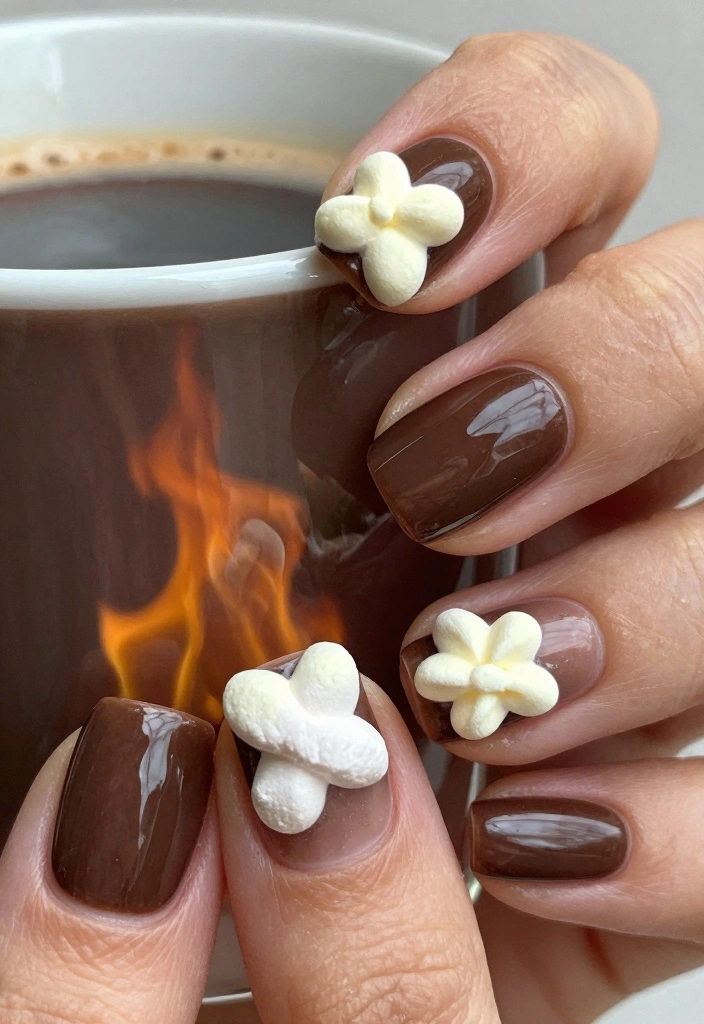
Wrap up your winter nail art journey with a cozy hot cocoa-inspired design! This warm and inviting look is perfect for chilly days.
To create this delightful design, start with a rich chocolate brown base. Use soft cream or pastel shades to paint marshmallows or whipped cream on accent nails, adding a sprinkle of glitter or tiny hearts to enhance the warmth.
Key steps for your hot cocoa nails:
– Start with a chocolate brown base
– Paint soft cream or pastel accents
– Add glitter or hearts for warmth
– Celebrate the comfort of winter
This design perfectly combines comfort and creativity, allowing you to stay stylish while enjoying the cozy vibes of winter!
Did you know 68% of people report feeling cozier with cocoa-inspired nails? A chocolate brown base with marshmallow accents brings this warm, cute winter nails vibe to life—perfect for chilly days and cozy selfies.
Conclusion
With so many cute winter nail ideas to choose from, there’s no excuse not to celebrate the season in style! Each design captures the charm and coziness of winter, allowing you to express your love for animals and the beauty of nature. From frosty ombres to whimsical snowman designs, these cute winter nails are the perfect finishing touch for any winter outfit.
Whether you choose to replicate these designs or let them inspire your creativity, embrace the soft color palettes and cozy nail art trends that warm your heart during the chilly months. Happy nail painting!
Frequently Asked Questions
What are some cute winter nails ideas for animal lovers?
There are plenty of options that fit the cute winter nails vibe. Start with a soft base in a pale pink, snowy white, or baby blue, then add an accent nail with an animal motif like paw prints, a penguin, panda, or fox. Use stamping plates or decals for clean lines, or hand-paint tiny faces with a fine brush. Finish with a glossy top coat for a cozy, winter-ready look that pairs with soft color palettes and cozy nail art.
For extra charm, vary the accents on one or two nails while keeping the rest simple so the design remains wearable and on-trend with winter nail designs and festive nail trends.
How can I achieve soft color palettes in winter nail designs at home?
To nail a soft color palette, choose calming shades like ivory, powder blue, dusty rose, sage, and taupe. Layer sheer coats for depth and blend colors with a subtle gradient for a wintry glow. Add a small animal detail on one nail using a fine brush or decals to keep the look cohesive with your cozy nail art.
Seal with a durable top coat and reapply every few days to maintain the soft color palettes while keeping your cute winter nails fresh. This approach also fits well with winter nail designs and festive nail trends.
What tools help create cozy nail art featuring animals?
Essential tools include a dotting tool, fine liner brush, stamping plates, nail decals, tweezers, and a sturdy top coat. Start with a base color, then lay down the animal motif on one accent nail using decals or freehand painting. Finish with a protective top coat in either glossy or satin finish to get the cozy nail art vibe on cute winter nails.
Pro tip: practice on a nail wheel first and keep your palette cohesive to match winter nail designs and soft color palettes.
How long do cute winter nails last and how should I care for them?
With regular polish, you can expect 5-7 days; with gel or dip, 2-3 weeks. For longer wear, apply a base coat, seal with a strong top coat, and avoid prolonged exposure to water and harsh cleaners. Wear gloves in cold weather, and moisturize cuticles daily to protect your animal-themed accents. Reapply the top coat every 3-4 days to keep the shine and prevent chipping, especially on the accent nail.
This care routine helps your cute winter nails stay festive and on-trend without frequent touch-ups.
Which festive nail trends pair well with animal-themed winter nails?
Pair animal motifs with trends like minimalist line art, soft metallic accents, or glitter tips for a balanced look. Matte finishes on most nails with a glossy accent nail keep the design fresh and cozy, while subtle negative space adds modern flair. Stick to a soft color palette to ensure the animal design remains the star of your cute winter nails.
This approach aligns with festive nail trends and winter nail designs that animal lovers will love to show off.
Related Topics
cute winter nails
cozy nail art
winter nail designs
festive nail trends
soft color palettes
animal lover nails
beginner friendly
easy nail art
DIY nail designs
seasonal nail trends
charm nail styles
nail art inspiration