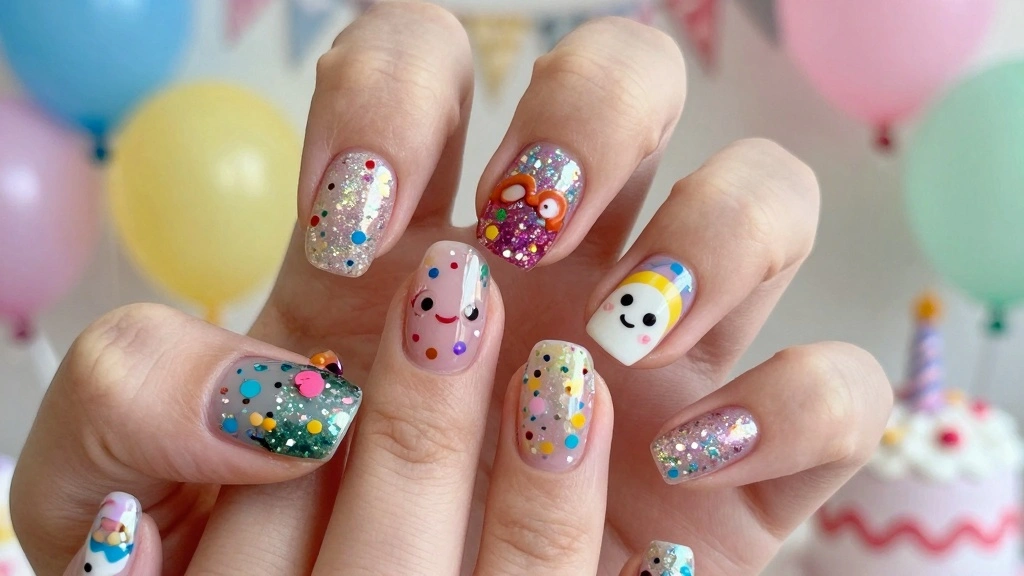
Birthdays are a special time filled with joy, laughter, and plenty of fun celebrations. Whether it’s a big party or a small family gathering, adding a personal touch to your birthday experience can make it even more memorable. That’s why I created this guide to share some fabulous birthday nails ideas that are perfect for kids, ensuring they sparkle as brightly as the birthday cake!
If you’re a parent looking to make your child’s birthday even more special or a young birthday star wanting to stand out, you’re in the right place. This post is designed for those who appreciate the fun of festive nail art and want to express themselves creatively. We understand how much kids love to show off their unique style, especially on their big day!
In this guide, you’ll find 15 vibrant and playful birthday nail designs that range from whimsical unicorns to colorful tie-dye. These ideas are perfect for any birthday celebration, whether it’s an extravagant party or a cozy get-together. Get ready to explore fun, glam, and colorful nail ideas that will help you shine during your birthday festivities and create lasting memories!
Key Takeaways
– Discover 15 creative birthday nails ideas that cater to kids, making their celebration extra special and memorable.
– Explore various designs like sparkly unicorns and rainbow swirls that capture the playful spirit of a birthday party.
– Each nail design incorporates glitter and color, ensuring that your child’s nails align perfectly with the festive atmosphere.
– Tips for easy application and materials needed to recreate each design, making it accessible for parents and kids alike.
– Emphasize the joy of creativity, allowing kids to express themselves through fun character nails and cute animal faces.
1. Sparkly Unicorn Dream
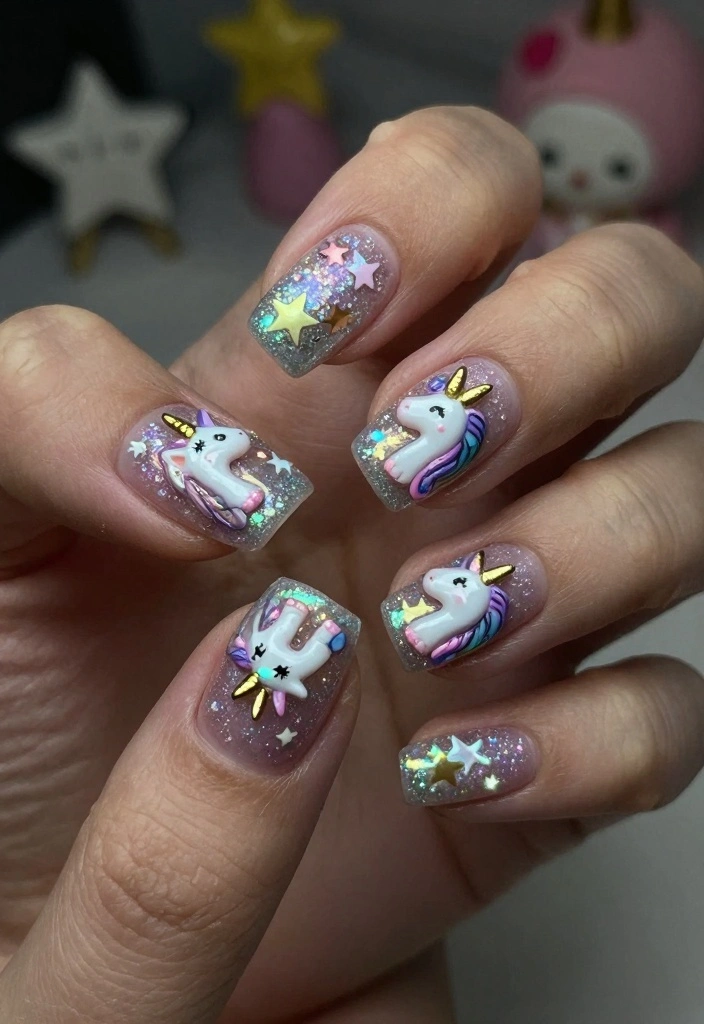
Are you ready to add some magic to your nails? Unicorn-themed nails are a delightful trend that brings sparkle and whimsy to any birthday party. Start with a soft pastel base, like lavender or baby pink, and then sprinkle on glitter at the tips for a dreamy touch. Top it off with tiny star decals or even a unicorn charm for that wow factor!
For a flawless finish, opt for a fast-drying top coat to seal in the glitter. A small nail brush can help you apply the glitter precisely. Don’t hesitate to mix different colors for a more enchanting look. This design is sure to transform plain nails into a fantastic work of art, perfect for celebrating your little one’s special day!
Key ingredients for your magical nails:
– Soft pastel base coat
– Iridescent glitter polish
– Star decals or unicorn charms
– Fast-drying top coat
Follow these simple steps:
1. Apply the base coat and let it dry completely.
2. Paint your nails in the chosen pastel color.
3. Dab glitter on the tips using a sponge.
4. Add the decals before the top coat dries.
5. Seal it all with a top coat for extra shine.
Your nails will shimmer just like the joy of a birthday celebration!

【Nail Salon for Kids】BATTOP nail art kit is designed for girls aged 7-12. Children can enjoy becoming beautiful just like Mom.No only satisfying the love of beauty in every little girl but also exercising your child's hands-on skills and concentration, focusing on DIY nail art. Best girls toys age 6-8 !!!

【All In One Kids Nail Polish Kit】This adorable nail art kit is specially designed for little girl to fulfills their dream of charming nail art, including 8 nail polishes, 1 pink storage case, 1 nail dryer, 1 toe separator, 1 glitter power, 1 nail file, 2 brushes, 1 nail sticker, 1 diamond sticker, 10 fake nail; sufficient quantity and diverse styles to meet your needs.
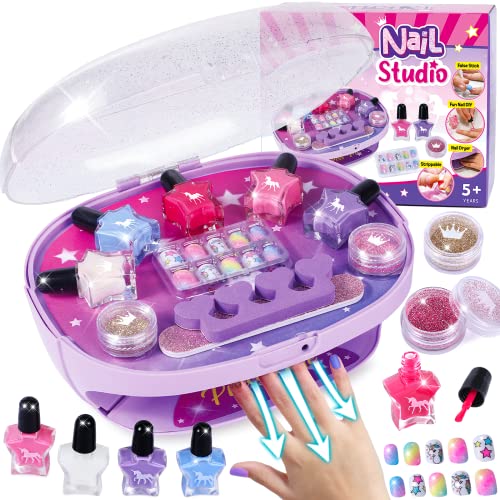
ALL IN ONE KIT - There is a storage function on the dryer, and everything can be stored above the dryer without worrying about messing up or losing something after use. Our nail polish set includes a battery-operated nail dryer that also doubles as a storage case for nail art accessories, 5 nontoxic nail polish, 1 sheet of nail stickers for nail art, 1 pedicure tools toe separator, 1 nail file, 2 boxes of nail glitter powder, and 10 false nails, 1 gift box for gift send
2. Rainbow Swirls
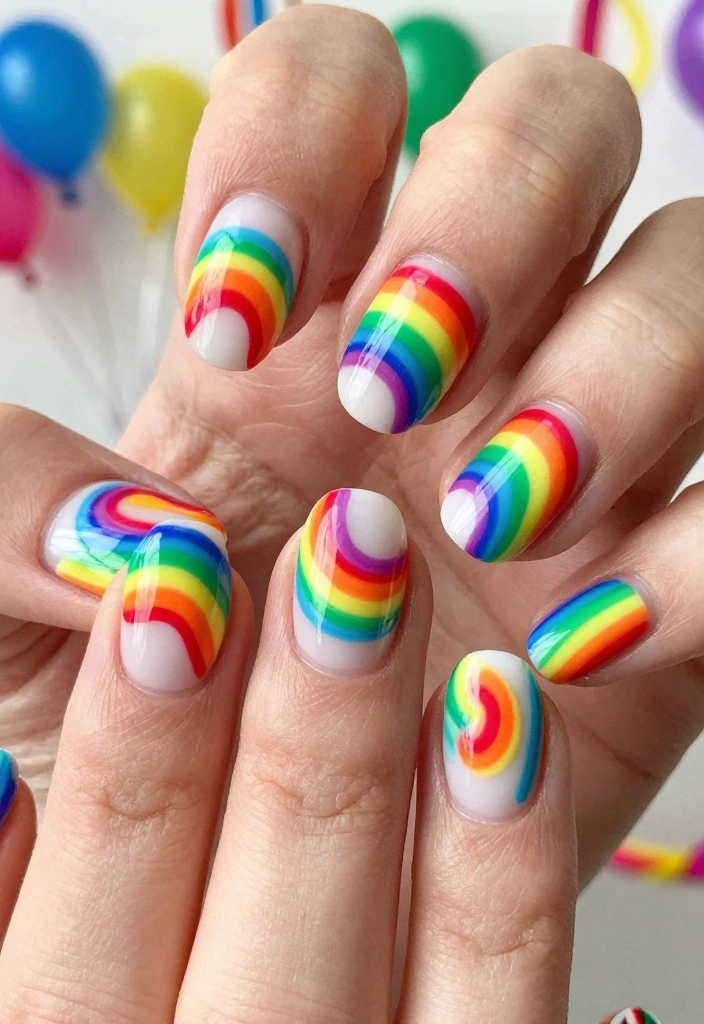
Want to make your nails pop with color? Rainbow swirls are a fun and vibrant choice that can brighten any birthday celebration. Begin with a white base to let the colors shine, and use a nail art brush or toothpick to create swirling patterns with bright polishes like red, orange, and green. This lively design is perfect for adding a festive touch to your special day!
To achieve the best results, consider using a matte top coat for a unique texture. Allow each color to dry for a moment before layering on the next to prevent mixing. Experiment with different swirl designs to make each nail a masterpiece!
Steps to create your rainbow nails:
– Apply a white base coat
– Choose bright polishes for your rainbow
– Use a brush to create swirls on each nail
Follow these simple steps:
1. Start with a white base coat and let it dry.
2. Choose your favorite rainbow colors and apply them one at a time.
3. Create swirls on each nail with a brush.
4. Let each layer dry before adding more colors.
5. Finish with a top coat for a smooth finish.
This stunning look celebrates creativity and joy, making it perfect for any birthday party!

SET INCLUDES: This set contains 84 bold and vibrant colored, pre-adhesive press-on nails, featuring the cute yet mischievous Stitch and his sweet companion Angel, all paired with a useful nail file. Perfect for Stitch and Lilo fans, it makes a fun and popular Stitch gift for girls.

We offer 12 different sizes of coffin false nails, the product contains: 24 nail clips, a wooden stick, a nail file and a jelly glue. Suitable for different fingers.
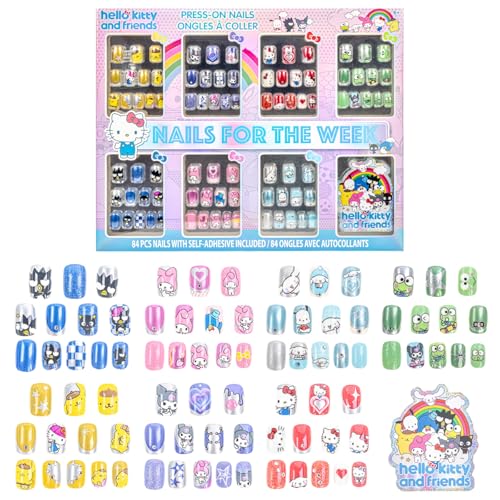
SET INCLUDES: This set contains 84 bold and vibrant colored, pre-adhesive press-on nails, featuring the adorable Hello Kitty and her friends, Kuromi, Pompompurin, Keroppi, Badtz-Maru, Cinnamoroll, and My Melody, paired with a useful nail file
3. Glittery Confetti Dots
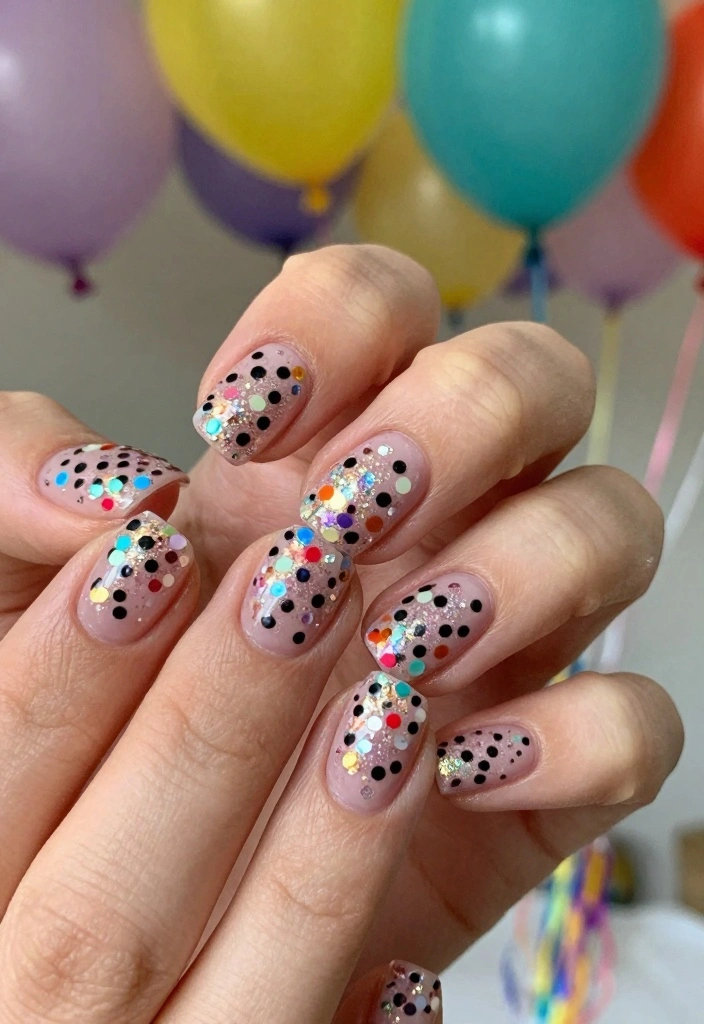
Looking for a fun, festive nail design? Glittery confetti dots are an eye-catching choice that brings party vibes to your fingertips! Start with a solid base color, like bright pink or shimmering gold, then use a dotting tool or toothpick to add colorful dots all around the nails, resembling confetti. This simple yet playful design is ideal for birthday celebrations!
To make your confetti nails stand out, select a base color that complements your confetti colors. Quick-drying polish is key for dotting, and feel free to use larger dots for added dimension. This design captures the spirit of a birthday bash beautifully!
Ingredients for your confetti fun:
– Solid base coat in a vibrant color
– Assorted polishes for colorful dots
– Top coat
Here’s how to create your confetti nails:
1. Paint your base color and let it dry.
2. Dip the dotting tool into various polishes and create dots on the nail.
3. Alternate colors for a playful look.
4. Seal with a top coat to keep everything intact.
This cheerful design is perfect for capturing the excitement of a birthday party!

【6 Colors Shell Thread Gel Polish Set】Beetles shell thread gel nail polish set includes 6 pearl shimmer gel polish colors and 1 dotting pen. The dreamy palette features pearl white, soft pink, rose pink, lavender purple, blue shimmer, and iridescent shell thread shades for romantic DIY nail art.

SILVER GLITTER GEL POLISH:Glitter gel nail polish is an easy way to add sparkle to any look. It’s easy to apply and hides imperfections,allowing you to get gorgeous-looking nails at home.This elegant and sparkly glitter gel polish is perfect for all kinds of occasions

NOTE: It is normal for the gel to be a little sticky, in order to better draw the thread effect. Can get Swirl Shell Thread effect with the Dotting Pen
4. Cute Animal Faces
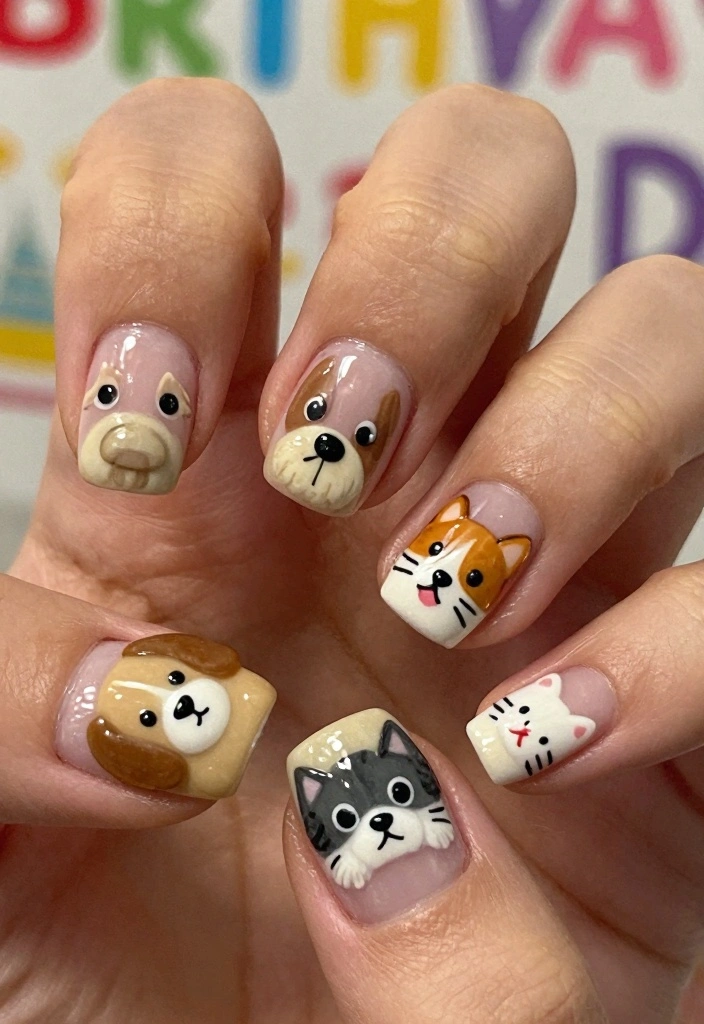
Ready to transform your nails into adorable animals? This design lets you showcase your child’s favorite animals, whether it’s a playful puppy, a sweet kitten, or a whimsical panda. Start with a neutral base coat and use nail polish to create cute faces, adding tiny ears and big eyes for added charm. This playful design is sure to be a hit at any birthday gathering!
For best results, keep the designs simple to make application easier. Use a fine brush for detailing, and choose animals that can be easily replicated for fun nail art. This design will bring smiles and joy to everyone at the party!
Gather your supplies:
– Neutral or pastel base coat
– Black, white, and colored polishes
– Top coat
Follow these simple steps:
1. Apply your base coat and let it dry.
2. Use a fine brush to create animal features.
3. Start with the face shape, then add eyes and ears.
4. Let the design dry, then finish with a top coat.
These cute animal faces will add a delightful touch to your birthday celebration!

Quantity: 8 Sheets cute animal nail art stickers, self-adhesive nail art design, each paper measure 4.1 x 3.1 inches. Contains a variety of patterns: unicorn, heart, rainbow, moon, star, flowers, etc. Approximately 800 pattern stickers for you to choose to decorate your own nail art.
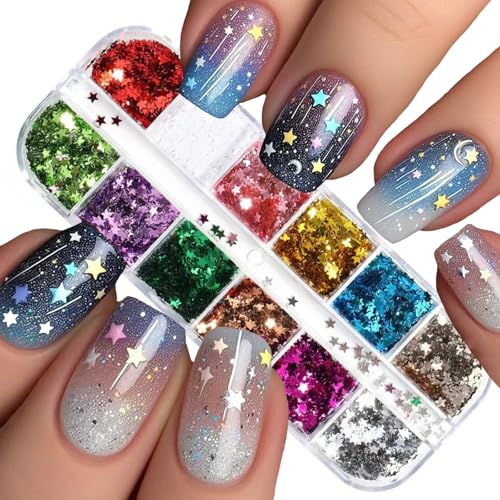
Package About:You get 1 boxes of star nail glitter sequins showing the changing colors of Christmas festival, they show shiny colors when viewed from different lights and angles, Make Your Nails Stunning and Luminous
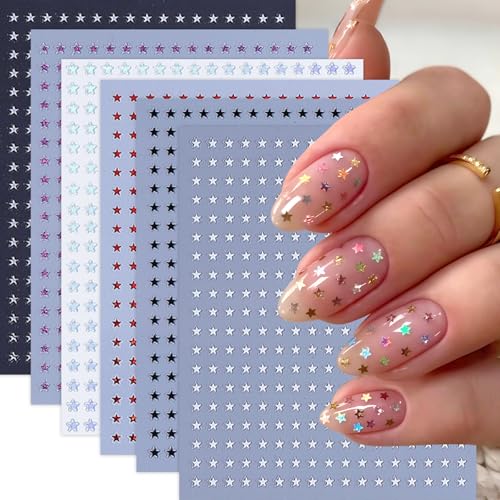
Unique Nail Sticker Set: You will receive 6 sheets star nail art stickers, different patterns are available for you to use and replace in your daily life, satisfying your rich imagination for nail DIY and bringing you different moods
5. Birthday Cake Inspired
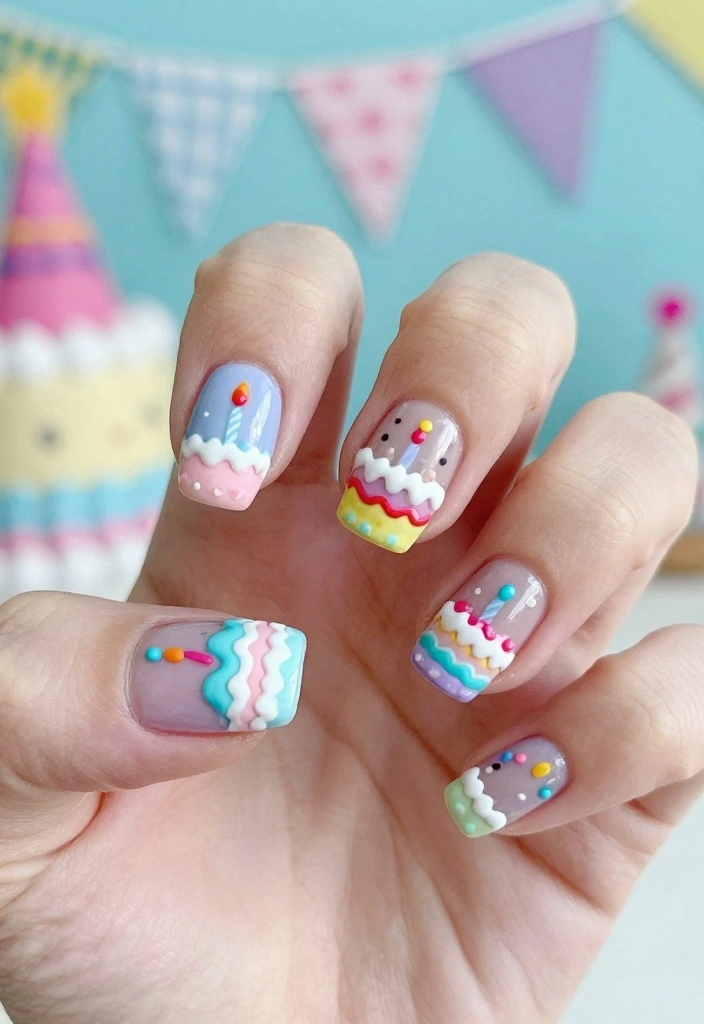
What better way to celebrate a birthday than with nails inspired by cake? Start with a light frosting-colored base like cream or pale pink, then use a dotting tool to add colorful sprinkles and tiny candles for extra festivity. This mouthwatering design captures the joy of a birthday celebration perfectly!
For a fun twist, try using a matte top coat for a frosted effect, or go for a shiny top coat to mimic real icing. Let your creativity run wild with sprinkle colors to make each nail unique and festive!
Ingredients you’ll need:
– Light frosting-colored base coat
– Assorted polishes for sprinkles and candles
– Top coat
Here’s how to create your cake-inspired nails:
1. Paint your nails with the frosting-colored base and let dry.
2. Use the dotting tool to create sprinkle designs.
3. Add tiny candle details on a few nails.
4. Finish with a top coat for a complete look.
This sweet design is sure to add a delightful touch to any birthday celebration!
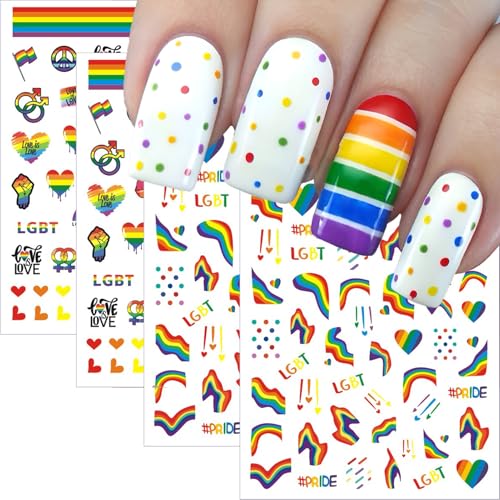
Celebrate Love & Pride All Year: Express your identity and support with our vibrant rainbow Pride nail art stickers! Featuring powerful symbols like hearts, flags, peace signs, lips, and “Love is Love” quotes – perfect for Pride Month, LGBTQ+ festivals, and everyday empowerment.

Package Content - 5 sheets nail polish strips for women + 1pc nail file, each nail strips sheets has 16 tips and 8 different sizes, you make unique nails like a professional designer.

✨ Celebrate with Pride – Show your support with vibrant 4-sheet 3D sticker set featuring rainbow hearts, "Love Wins" quotes, Pride flags, lips & stars. Perfect for Pride Month (June), parades, festivals, or daily wear to express your authentic self and allyship.
6. Shimmering Gemstones
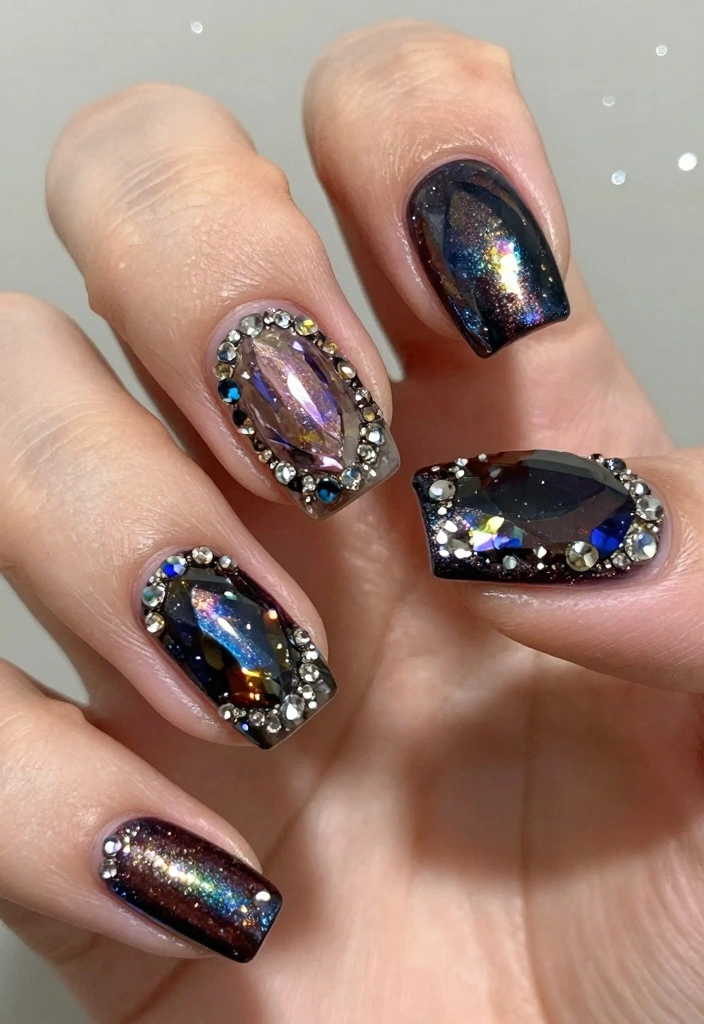
Want to add a touch of glam to your nails? Gemstone-inspired nails are perfect for kids who love a little sparkle! Start with a rich base color like royal blue or deep purple, and use nail art tools to create shapes resembling sparkling jewels. A metallic or glitter polish can enhance the shine for a truly dazzling effect!
For authenticity, consider using rhinestones or nail foil to replicate the look of real gemstones. Don’t hesitate to play with different shapes to make each nail unique. This design is great for adding a royal feel to any birthday celebration!
Key ingredients for your gemstone look:
– Solid base coat in jewel tones
– Metallic or glitter polish
– Rhinestones or nail foil
– Top coat
Follow these steps to create your shimmering nails:
1. Apply a solid base coat and let dry.
2. Create gemstone shapes using polish and nail tools.
3. Add rhinestones or foil to enhance the design.
4. Finish with a top coat to secure everything.
This dazzling design will make any birthday girl feel like royalty!

Safe & Non-Toxic Nail Polish: This adorable kids nail polish set is specially formulated to be safe, non-toxic and gentle for little hands. With 8 vibrant colors, the toddler nail polishes are free from harsh chemicals so you can let your princess express her creativity without worry. The perfect Birthday gifts for girls ages 6 7 8 -12 years old. Best christmas stocking stuffers kids.
YOUR VERY OWN NAIL ART STUDIO: Get your glam on with your very own nail polish studio! Create sparkly, colorful, bejeweled manicures to suit your mood and style. Do your own nails, or throw a party and invite your friends to polish along with you! Non-toxic and 100% kid-safe.

DIY NAIL ART: Tomons nail polish art kit includes all your design needs, 8*nail polish, 3*nail glitter, 1*patterned sequins, 1*letter sequins, 1*acrylic diamonds, 10*nail stickers, 1*nail file, 1*dotting pen, 1*nail art brush, 1*instruction booklet. Girls can experience DIY effects in a variety of colors and nail charms
7. Colorful Tie-Dye
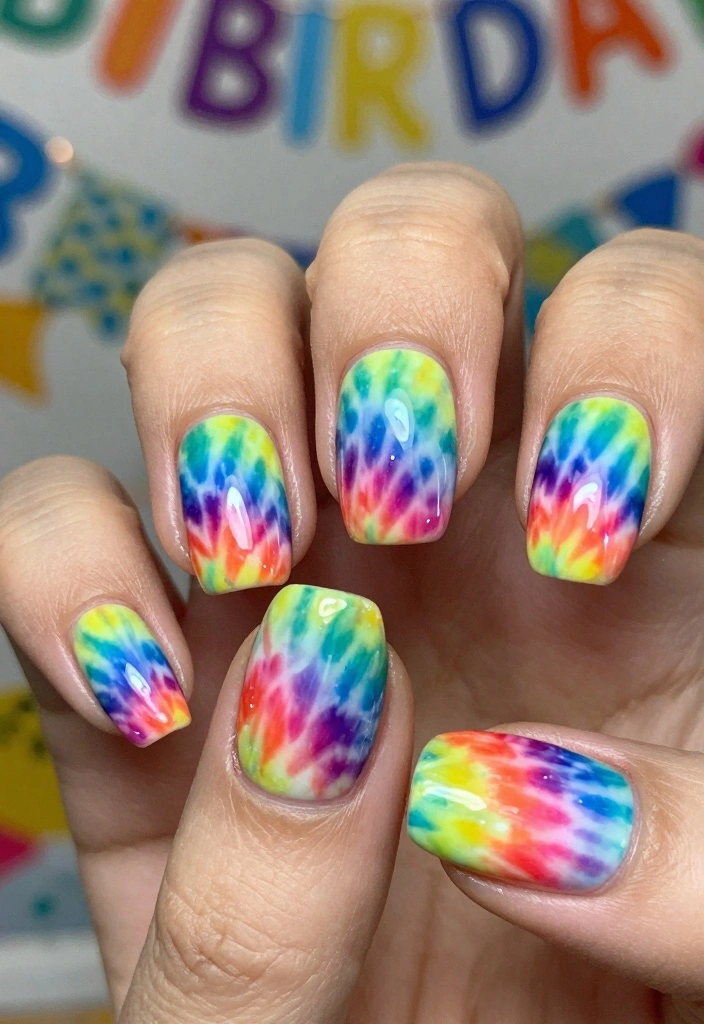
Dive into creativity with colorful tie-dye nails! Begin with a white or light base coat as your canvas, then swirl together bright colors using a sponge or brush to achieve that classic tie-dye look. Each nail can be a unique masterpiece, making this a fun project for kids!
Experiment with different color combinations to make it truly one-of-a-kind. A sponge will help create a soft blend, and be sure to seal the design with a glossy top coat for a shiny finish. This lively design will definitely make any birthday celebration more exciting!
Gather your supplies:
– White or light base coat
– Assorted bright polishes
– Top coat
Here’s how to create your tie-dye nails:
1. Apply the base coat and let it dry.
2. Use a sponge to dab on various colors randomly.
3. Blend the colors softly for a tie-dye effect.
4. Let dry, then finish with a top coat.
This cheerful design is perfect for adding a splash of fun to your birthday festivities!

Blue Gradient Glue on Nails Kit: There are 30 pcs of medium almond artificial finger nails 12 different sizes, 1 mini nail file, 1 small wooden stick, 1 nail sticker in the package.(Jelly glue doesn't last as long as liquid glue, but it can make fake nails reusable. Please use suitable glue according to different occasions)

Thrilez kids fake nails package contains 6 packs pink kids' nails, a total of 144 pieces. And 10 different nail tips included, from big to small sizes as follows, 16x12.5mm, 16x12mm, 15.5x10mm, 14.5x10mm, 14.2x10mm, 14x8.5mm, 14x8mm, 13x7mm, 12x7mm, and 11x6.5mm. Please measure the nails before purchasing to ensure you can get the appropriate products. With cute design flowers, unicorn and pineapple patterns. Kids nail tip kit is popular for girls

Sweet-Meets-Edgy Design: Hand-placed 3D brown flower, steel beads, and leopard-blossom ombre create a bold yet feminine look for autumn and holiday fashion
8. Happy Birthday Messages
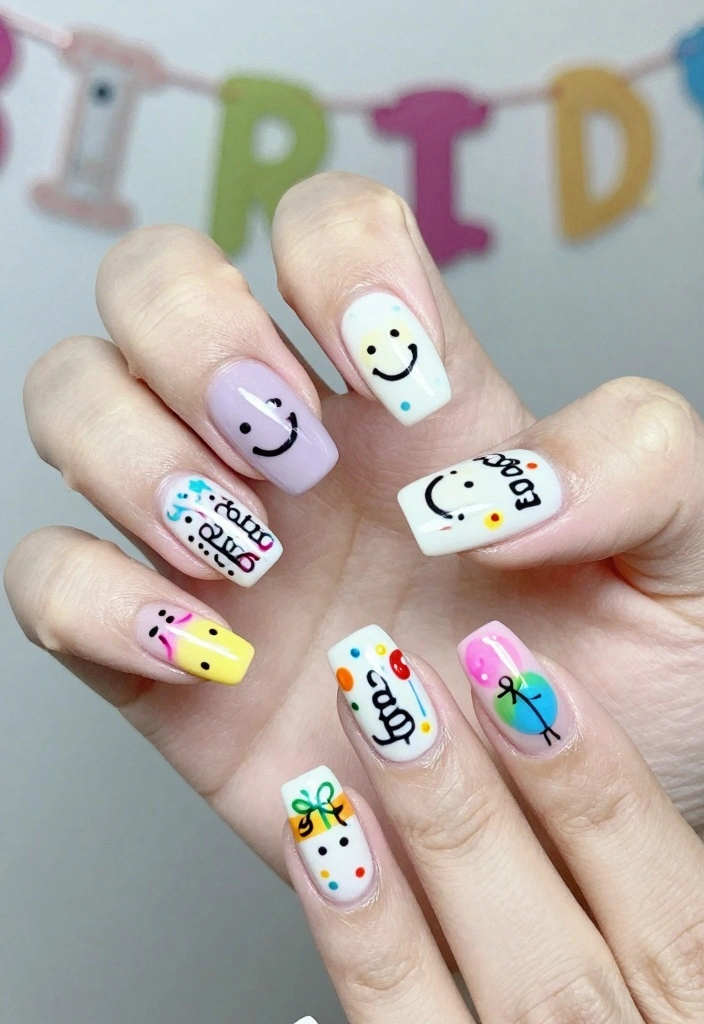
Celebrate the birthday girl with nails that say ‘Happy Birthday’! Choose a bold base color and use nail pens or brushes to write sweet messages, adding tiny balloons and gifts for a festive touch. This personal design not only looks fun but also makes the birthday girl feel special!
To ensure clarity, keep your messages simple and choose contrasting colors for visibility. A fine brush will help achieve neat lettering, making your nails a true celebration of the day!
Ingredients for your message nails:
– Bold base coat
– Nail pens or fine brushes
– Top coat
Here’s how to create your birthday message nails:
1. Apply a bold base coat and let it dry.
2. Use a fine brush or nail pen to write your messages.
3. Add tiny drawings around the words for extra cheer.
4. Seal with a top coat for durability.
These charming message nails are a delightful way to share birthday joy!

Unique Cloud Chameleon Glitter Effect: This 6 color uv gel nail polish set features a mesmerizing cloud chameleon broken diamond effect with ultra-fine diamond glitter. Each shade shifts beautifully under different lighting and nail bases, allowing one bottle to create multiple looks. Compared to ordinary glitter gel, the high-reflective diamond powder delivers an intense sparkle that shines brilliantly under flash and sunlight.

【Best Gift for Her】Compatible with ALL BRANDS Soak-off Gel Nail Polish.Suitable for natural nails, nail lamp gel nails, artificial nails, acrylic nails, nail tips, etc.You can use this gel single or apply with any color base. What's more, you don't need to apply extra top coat anymore!

Glitter Effect and Reflective Effect: The RARJSM reflective glitter gel nail polish is interesting and it can create two effects. You can apply it for daily life and parties, it will present a glitter effect under the natural light and a reflective effect under the flashing light. You can apply it to go to parties and other celebrations. It will bring you a fantastic nail art manicure
How To Choose the Right Birthday Nails Ideas
Choosing the perfect birthday nails can make your celebration even more special! Here are some essential tips to help you select the right designs that will dazzle at any glam party.
1. Consider the Theme
Before picking your nail design, think about the birthday party’s theme. Is it a whimsical unicorn party, a bright rainbow celebration, or a glamorous mermaid gathering? Matching your nails with the theme will enhance your overall look and make your nails a conversation starter. For instance, if your party features unicorns, a sparkly unicorn dream design could be perfect!
2. Choose Colors Wisely
Colors play a crucial role in nail art. Bright and bold colors often reflect a fun and festive mood, while pastel shades can lend a softer, more elegant touch. Think about what colors make you feel happy and confident. For colorful nail ideas, consider using a mix of colors that complement each other, like pinks, blues, and purples, to create a visually stunning look.
3. Assess Your Skill Level
Before diving into intricate nail art, evaluate your nail painting skills. If you’re a beginner, start with simpler designs like colorful polka dots or sweet candy stripes. More advanced artists can tackle detailed designs like shimmering gemstones or cute animal faces. Remember, practice makes perfect, so don’t hesitate to try a few designs before the big day!
4. Think About the Occasion
The type of party you’re attending can influence your nail choices. For a fun child’s birthday party, playful designs like birthday cake-inspired nails or fun character nails are ideal. If you’re attending a more sophisticated gathering, opt for glamorous options like glittery ombre or shimmering gemstones. Tailoring your nails to the event ensures you feel appropriate and stylish.
5. Prioritize Comfort and Wearability
Nail designs should not only look good but also feel comfortable. If you lead a busy lifestyle, consider choosing designs that won’t chip easily and are easy to maintain. Festive manicures with glitter may look stunning but can be harder to remove. Opt for gel nail polish or press-on nails for longer wear and hassle-free removal when the party is over.
6. Personalize Your Design
Finally, make your nails reflect your personality! Adding small details like a special birthday message or your favorite colors makes your nails uniquely yours. Consider incorporating your initials or a small symbol that holds significance to you. This customization will not only make your nails look great but also add a personal touch that resonates with your birthday spirit.
Pro Tip: Don’t be afraid to mix and match different designs! You can combine a few birthday nail designs like fun character nails and colorful tie-dye for a playful and festive look. Try using nail stickers or stencils to help create more complex designs without the stress.
By considering the theme, colors, skill level, occasion, comfort, and personalization, you can choose the right birthday nails ideas that will make your celebration truly fun and memorable! Enjoy experimenting and have a fabulous birthday!

Package:You will get 6 sheets of star nail art stickers in this package,you can find the patterns you like and create your own style.For women kid girls,exquisite nail design DIY fashion nail decoration

Pefect 14 Sheets Nail Stickers: You will receive 14 Sheets Star 3D self adhesvie Nail Art Stickers, a variety of colors for you to use and change in your daily life, the star pattern is very classic, suitable for a variety of styles of nail art style design.

Comprehensive set: The package contains 8 sheets of star nail stickers, unique star, each with various styles. These stickers are perfect for nail decoration and are the best choice for French manicure. With this set of stickers, you can enjoy different and unique manicures every day, adding elegance and creativity to your nails.
9. Festive Glitter Ombre
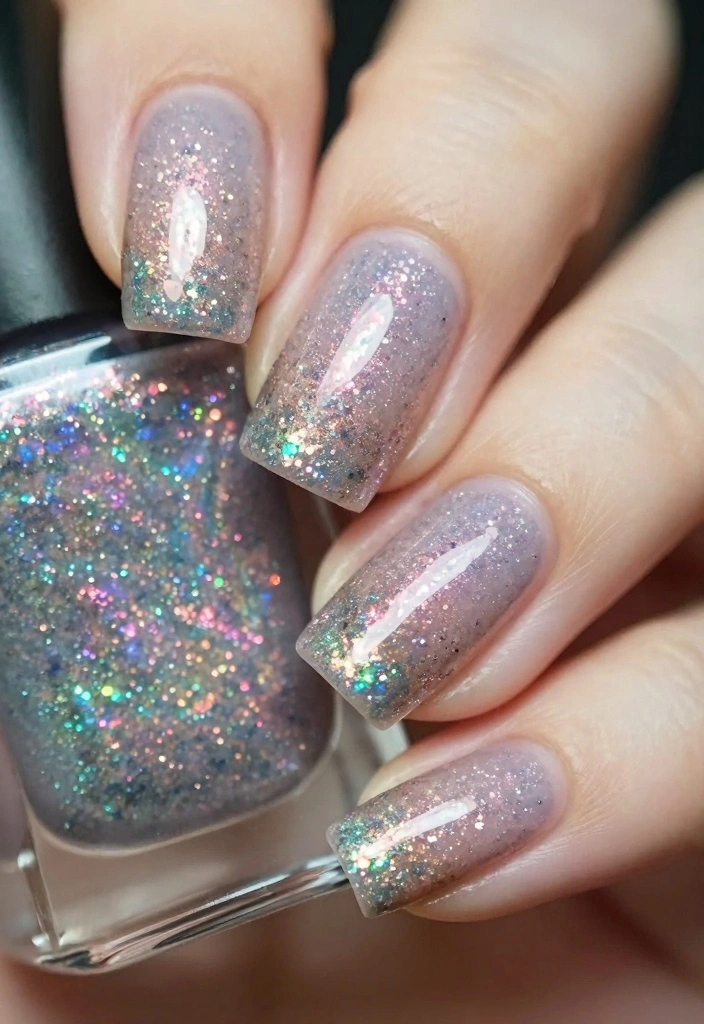
Ombre nails are a stylish choice, especially when enhanced with festive glitter! Start with a solid base color, like pink or turquoise, and blend a glitter polish into the tips for a stunning gradient effect. This elegant yet playful design is perfect for any birthday celebration!
For the best ombre effect, use a makeup sponge to blend the glitter. Choose glitter that complements or matches your base color for a cohesive look. Finish with a glossy top coat for added shine and durability. This glamorous ombre will make any birthday feel extra special!
Gather your ingredients:
– Solid base coat in a fun color
– Glitter polish for the ombre effect
– Top coat
Follow these steps to create your ombre nails:
1. Apply your solid base coat and allow it to dry.
2. Use a sponge to dab glitter polish onto the tips.
3. Gradually blend down towards the base color.
4. Let it dry and finish with a top coat.
This fabulous ombre design is a fantastic way to celebrate any birthday!
Fun fact: A glossy glitter ombre can be completed in under 20 minutes with a simple makeup sponge blend. For birthday nails ideas that wow, blend the glitter toward the tips with a sponge. Pro tip: match the glitter to your base color for a cohesive, party-ready vibe.

✨ Celebrate with Pride – Show your support with vibrant 4-sheet 3D sticker set featuring,"I ❤️ LGBT," "Love Wins," "Be Visible," "Equal Rights," plus iconic symbols including rainbow hearts. Perfect for Pride Month (June), parades, festivals, or daily wear to express your authentic self and allyship.
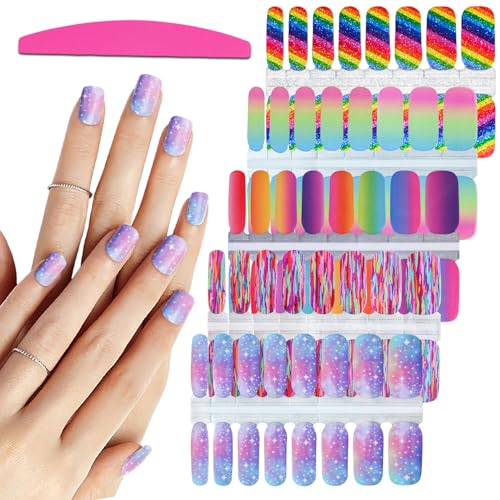
Package Content - 5 sheets gel nail wraps + 1pc nail file, each nail strips sheets has 16 tips and 8 different sizes, a variety of styles and color, let you always keep gorgeous nails.

Vibrant Rainbow Designs: Includes a variety of colorful patterns like rainbows, hearts, polka dots, stripes, smiley faces, flower, and unicorns — perfect for Pride Month, parties, holidays, or adding a fun twist to your everyday look.
10. Fun Character Nails
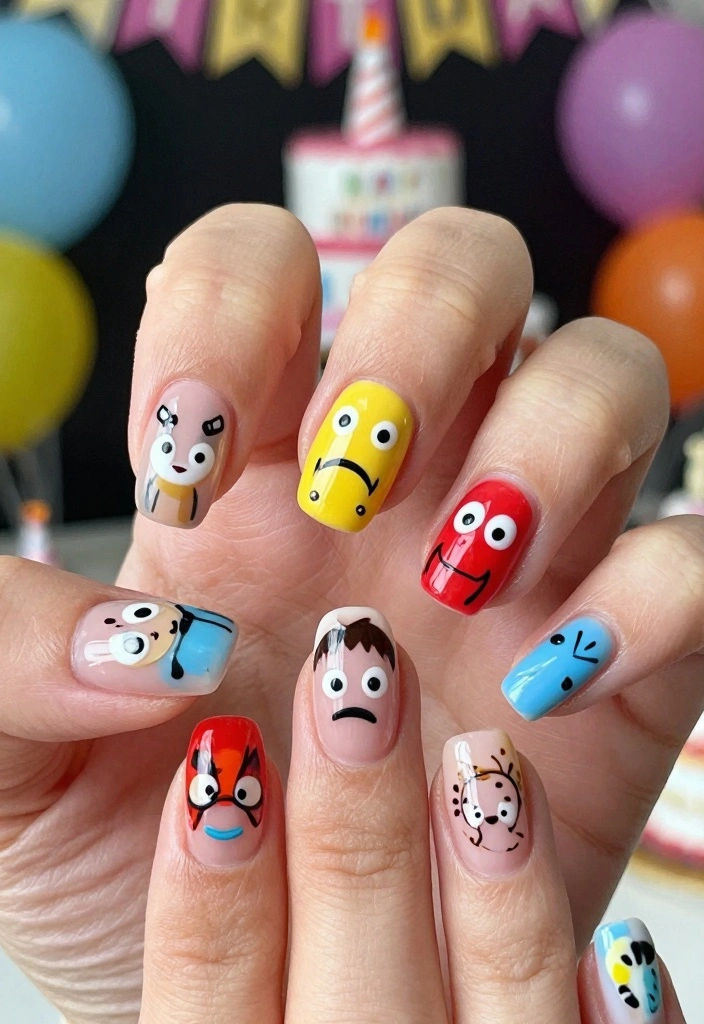
Want to turn your nails into a canvas for beloved characters? This design allows you to showcase characters from movies, cartoons, or books that the birthday child adores. Start with a light base coat and either hand-paint or use stickers for easy application. This creative design makes for a fun way to celebrate their special day!
For the best results, keep character designs simple so they’re recognizable. If you prefer, nail stickers can provide precision and ease. A glossy top coat will enhance the artwork and give it a polished look!
Ingredients for character nails:
– Light base coat
– Assorted colored polishes for details
– Character stickers or nail art brushes
– Top coat
Here’s how to create your fun character nails:
1. Apply a light base coat and let dry.
2. Paint characters or apply stickers onto the nails.
3. Use a fine brush for details, then let dry.
4. Finish with a top coat for protection.
These imaginative character nails will surely be a hit at the birthday party!
❝Turn birthday nails into a character canvas—stickers save time and still read iconic. For easy, kid-friendly designs, keep lines simple and finish with a glossy top coat. Pro tip: mix your birthday nails ideas with playful characters for a crowd-pleasing glow!
11. Sweet Candy Stripes
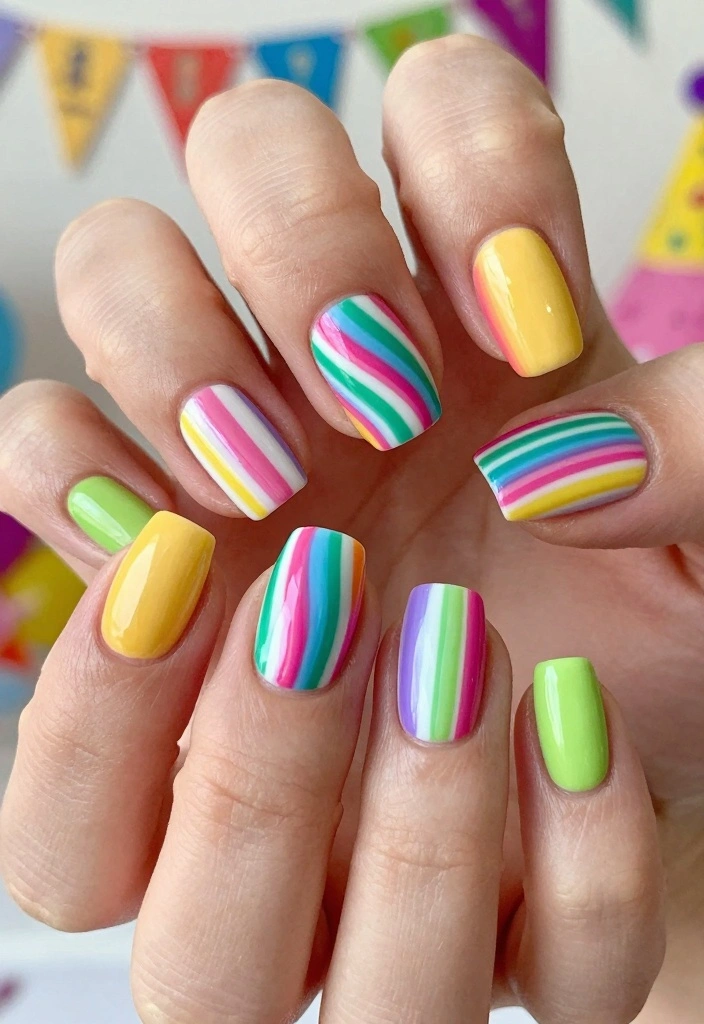
Brighten up the birthday celebration with sweet candy stripe nails! Choose a vibrant base color and use striping tape to create fun lines across your nails. Fill in the spaces with alternating candy colors like red, yellow, and blue. This design not only adds color but also brings a festive candy shop vibe!
Make sure your base coat is fully dry before applying the tape for clean lines. Nail tape will help you achieve straight edges, and don’t hesitate to get creative with your color combinations!
Ingredients for your candy stripe nails:
– Bright base coat
– Assorted candy-colored polishes
– Striping tape
– Top coat
Here’s how to create your candy-striped nails:
1. Apply a bright base coat and let it dry completely.
2. Place striping tape on the nails to create sections.
3. Fill in each section with different colors.
4. Remove the tape while the polish is still wet.
5. Finish with a top coat for durability.
These candy stripe nails will surely sweeten up any birthday party!
12. Bright Polka Dots
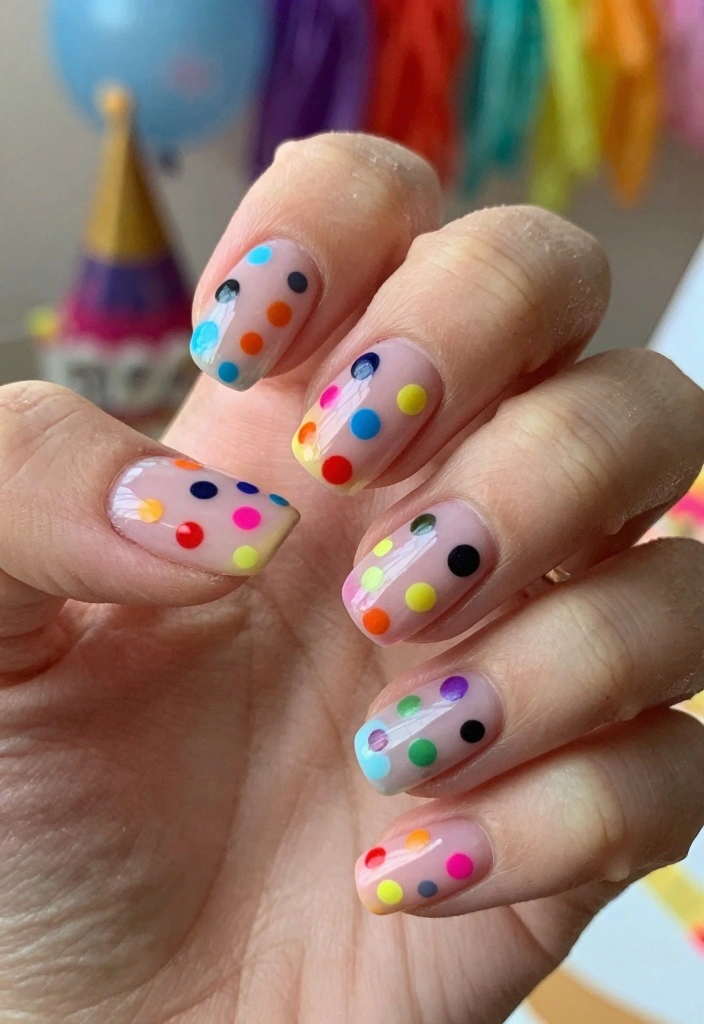
Polka dots are a timeless and fun choice for birthday nails! Start with a solid base color and use a dotting tool to apply dots of varying sizes in bright colors. This playful design is simple to achieve and works with any color combination you desire!
Mixing big and small dots adds interest to the design. Choose complementary colors for a cohesive look, and try a matte top coat for a trendy finish. This cheerful design will surely add a splash of joy to any birthday celebration!
Ingredients for your polka dot nails:
– Solid base coat
– Bright colored polishes for dots
– Top coat
Here’s how to create your playful polka dot nails:
1. Choose a solid base coat and paint all nails.
2. Use a dotting tool to add dots in various colors.
3. Let it dry completely.
4. Seal with a top coat for lasting wear.
These delightful polka dot nails will be a fun addition to any birthday celebration!
13. Glittery Starry Night
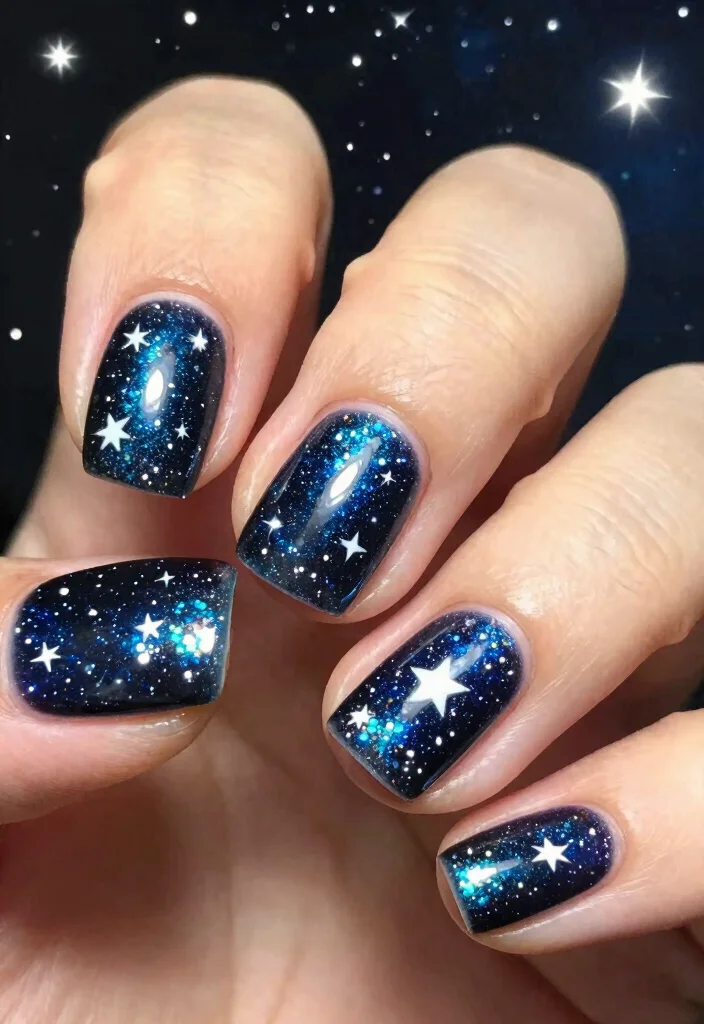
Capture the magic of a starry night on your nails! Begin with a dark base color, like navy or black, and apply star decals or paint tiny stars around the nails. Finish with a layer of glitter for a sparkly effect that adds depth and wonder. This design is perfect for any birthday party, especially for little ones who love space!
For detailed star painting, a fine brush is essential. Layer different types of glitter for a multidimensional effect, and consider using glow-in-the-dark polish for extra fun!
Ingredients for your starry night nails:
– Dark base coat in navy or black
– Star decals or white polish for painting
– Glitter polish
– Top coat
Here’s how to create your starry night nails:
1. Apply a dark base coat and let dry.
2. Paint or apply star decals to the nails.
3. Add a layer of glitter polish for sparkle.
4. Finish with a top coat to secure the design.
These starry night nails will surely inspire dreams on their special day!
14. Party Hat Nails
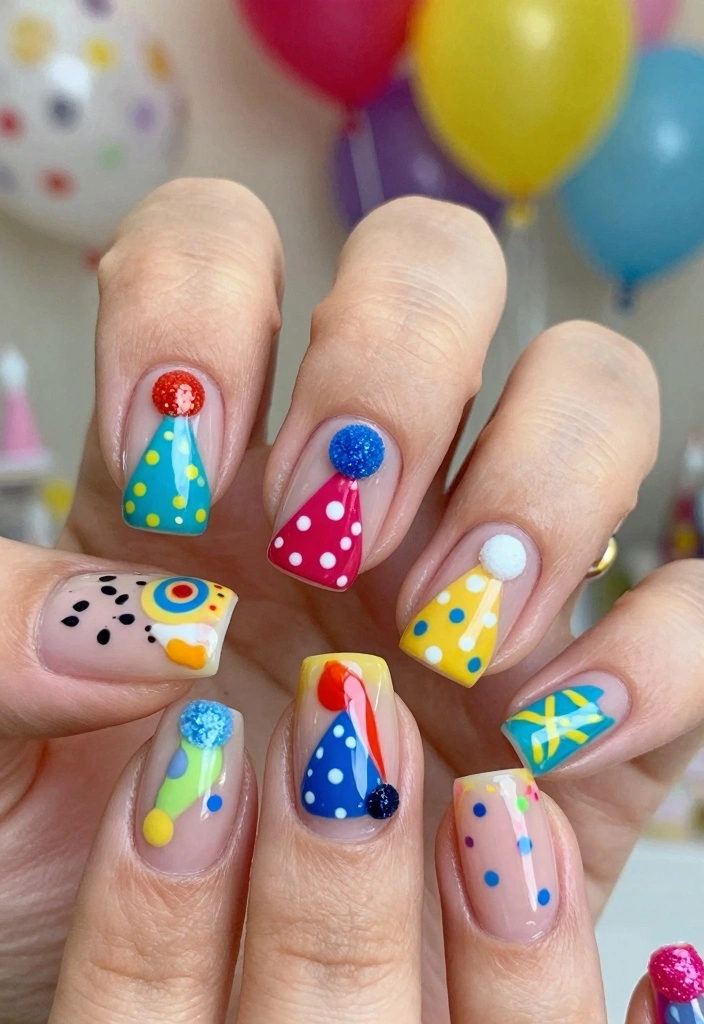
Get ready to celebrate with fun party hat nails! Start with a colorful base and paint tiny party hats on each nail using bright colors. Add a shiny pom-pom on top with a dotting tool for that extra festive flair. This design captures the spirit of a birthday party and adds cheerful fun to any nail look!
Keep the shapes simple for easier application, and vary the colors for each nail for a playful touch. Seal it all with a top coat to ensure your design stays intact throughout the celebration!
Ingredients for your party hat nails:
– Fun base coat color
– Assorted colored polishes for hats
– Top coat
Here’s how to create your party hat nails:
1. Apply the fun base coat and let it dry.
2. Paint tiny party hats on each nail using different colors.
3. Add a shiny dot on top for the pom-pom.
4. Finish with a top coat for protection.
These party hat nails will bring a festive flair to any birthday celebration!
Fun fact: bright base with tiny party hats on each nail can boost birthday vibes in as little as 2 minutes—it’s a quick win for birthday nails ideas. Keep shapes simple, switch colors for each nail, and seal with a top coat so the look stays festive all party long.
15. Magical Mermaid Scales
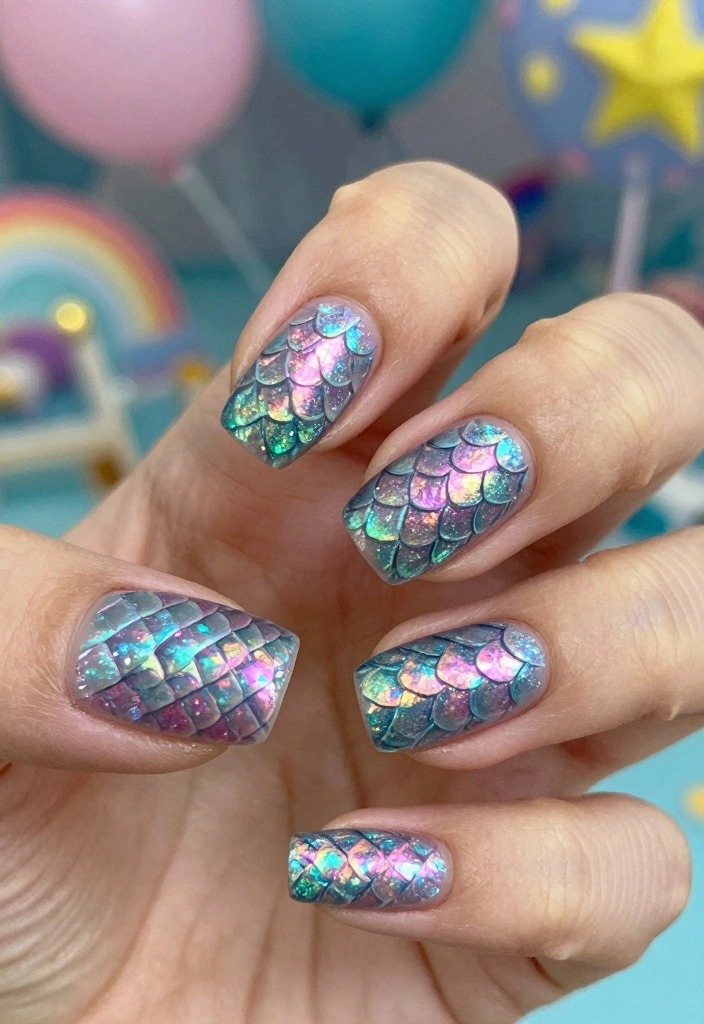
Dive into the ocean with magical mermaid scale nails! Start with a shimmering base color like teal or sea green, and use a nail art brush to create scale patterns with a complementary color, layering them for depth. This whimsical design is fantastic for any little mermaid fan and adds a splash of fun to birthday festivities!
For detailed scales, a fine brush is essential, and consider trying a holographic polish for an enchanting effect. Finish with a top coat to keep your design shiny and vibrant!
Ingredients for your mermaid nails:
– Shimmering base coat in teal or sea green
– Complementary nail polish for scales
– Top coat
Here’s how to create your magical mermaid scale nails:
1. Apply the shimmering base coat and let dry.
2. Use a fine brush to create scale patterns with a different color.
3. Layer the scales for added depth.
4. Finish with a top coat for durability.
These magical mermaid scale nails are sure to be a hit at any birthday celebration!
Conclusion
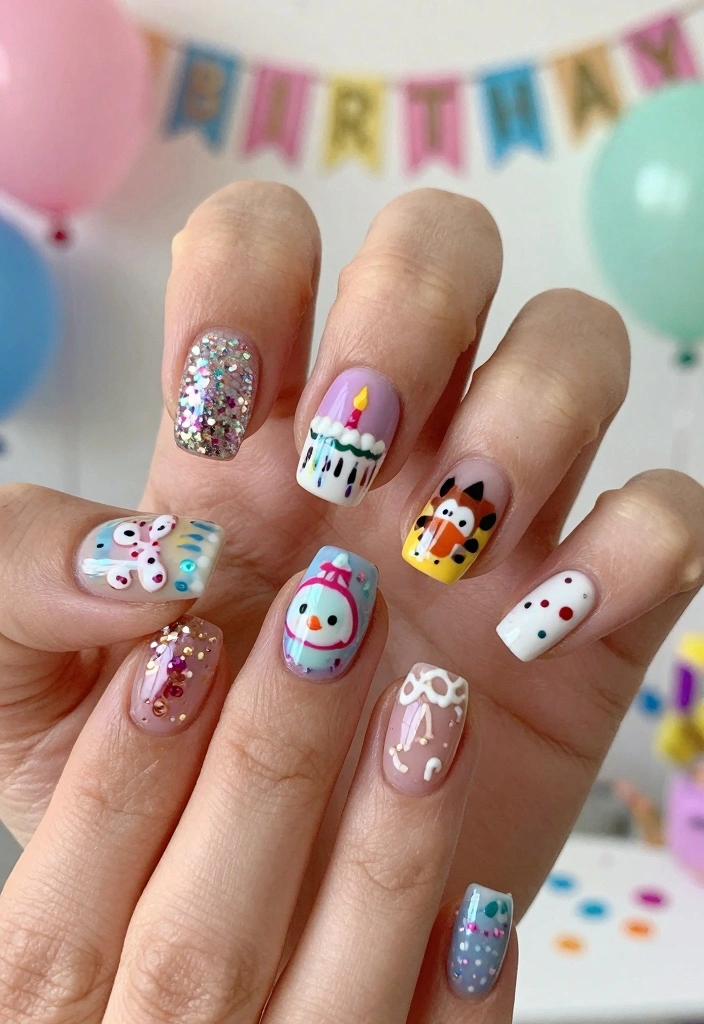
With these 15 fantastic birthday nail ideas, every birthday celebration can be a colorful and fun experience! From sparkly unicorns to magical mermaid scales, there’s something here for every child to express their unique style. Whether you choose to DIY these looks or take them to a nail artist, each design is sure to bring joy and sparkle to special moments. Why not gather your supplies and start planning the perfect festive manicure for the next birthday party?
Frequently Asked Questions
What are some top birthday nails ideas for a glittery kids party look?
Looking for birthday nails ideas that shine at a glittery kids party? Here’s an easy, joyful approach. Start with a bright base color like pink, purple, or sky blue to keep things colorful nail ideas. Add a glam nails touch with a glitter gradient on the tips or scatter tiny decals such as balloons, stars, and cupcakes. Use a kid-friendly top coat to lock in the sparkle and prevent chips. Finish with a quick-dry top coat and cuticle oil, and keep nails short for a safe, party-ready look. This hits birthday nail designs, party nail art, and a festive manicure that kids will adore.
How can I achieve glam nails at home for a festive manicure tailored to a birthday party?
Absolutely—here’s a simple at-home routine for glam nails that fits a birthday party. Start with clean, short nails and a base coat. Apply 1–2 coats of color, then add a glitter gradient or a single accent nail with stickers for party nail art flair. Seal with a shiny top coat to create a festive manicure that lasts through photos and fun. Allow each layer to dry, and finish with cuticle oil. This approach aligns with birthday nails ideas and makes birthday nail designs easy to achieve at home.
What are easy party nail art ideas I can use to create birthday nail designs that pop on photos?
For pops in photos, try glitter tips, confetti nails, balloon decals, or cupcake accents. Use a two-color palette plus glitter to keep things colorful nail ideas and camera-friendly. Add alphabet or numbers to spell out ‘BIRTHDAY’ on one nail for a playful party nail art look. Finish with a clear top coat for shine and durability. This keeps your birthday nail designs bold yet simple and perfect for a festive manicure.
Which colors and glitter combos work best for colorful nail ideas that are kid-friendly?
Think pastel pinks, lilacs, and baby blues paired with gold or holographic glitter—it’s a winning colorful nail ideas combo that stays kid-friendly. Try a two-color base with a glitter accent nail, or a glitter gradient on the tips. Keep shapes simple with dots or stripes to maintain a festive manicure. Use non-toxic polishes and a protective top coat to guard against chips.
How long do birthday nails ideas typically last and how can I extend wear?
With proper prep and a good top coat, birthday nails ideas can last about 5–7 days for kids. To extend wear: prep nails, apply base coat, two color coats, add a glitter accent, and finish with a durable top coat; reapply top coat every 2–3 days. Avoid soaking hands in water for the first 24 hours after painting, and use a gentle remover when it’s time to take them off. This helps keep your birthday nails ideas looking fresh for the celebration and photos.
Related Topics
birthday nails
glam nails
festive manicure
colorful nail art
party nail designs
kids nail ideas
easy nail designs
glitter nails
themed nail art
fun nail ideas
birthday celebrations
DIY nail art